

Issue, transfer, and adjust stock
This page covers the operations that reduce or relocate stock outside retail sales: stock documents, loans, transfers between warehouses, moves between bins, packs measured by weight, and adjustments. It also shows how to read the stock ledger when you need to trace a movement. It is written for warehouse staff and their manager.
Choose the right document type before you start. If you sell goods through a stock-out entry, you lose the payment, revenue, and customer records. If you put damaged goods through the POS, you record revenue that never happened. The stock ledger is only reliable when every movement is recorded as what it really is.
Match the reason to the document
Customer sales go through the POS or channel orders. Differences found while counting are settled in a stock count, never with a stock-out entry that makes the numbers fit. The middle branches are covered on this page. A completed document that later turns out to be wrong is covered in Adjust when a number is already wrong.
How a stock document works
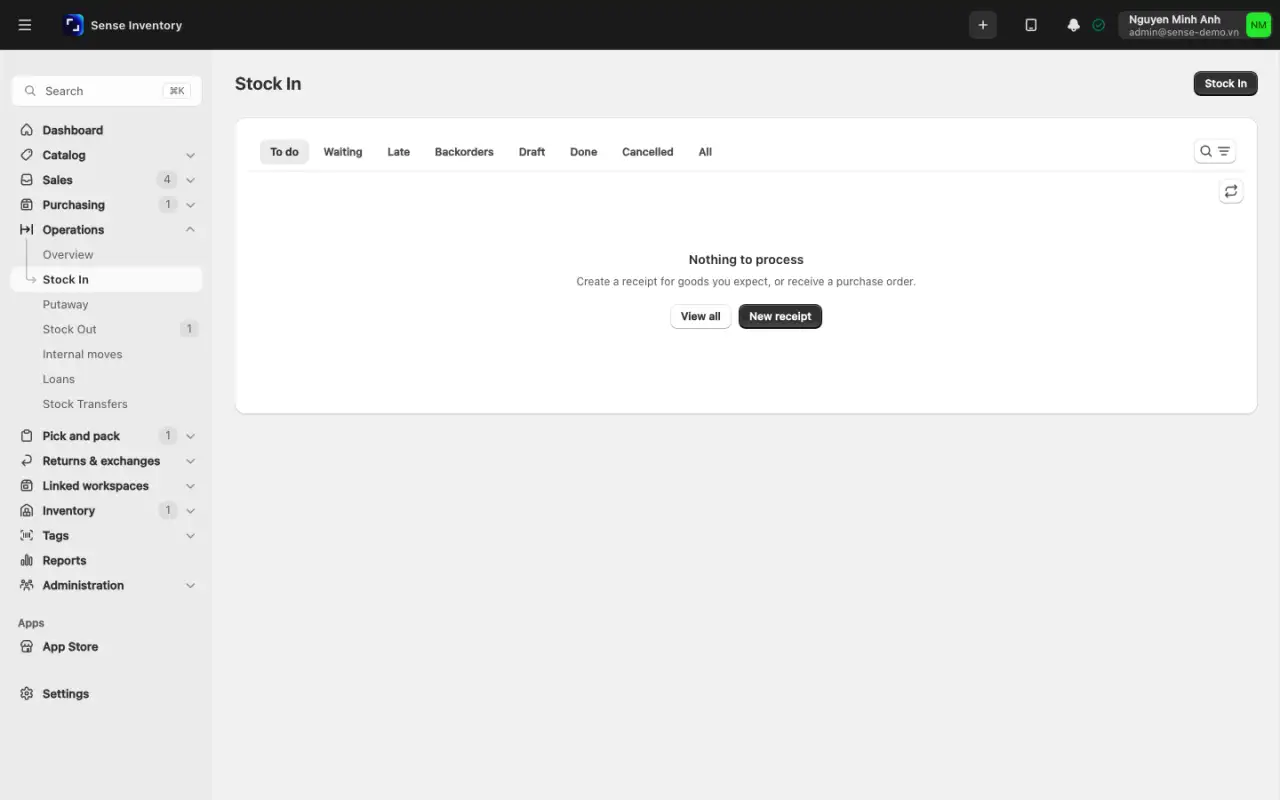
Stock In and Stock Out documents record everyday stock changes. One document moves goods into or out of one warehouse. Stock moves only when the document reaches Completed. Both lists are under Operations (Stock Operations on the classic layout).
Draft → Submit → Submitted → Approve → Approved → Complete → Completed
- Approval off: Submit approves and completes the document in one step. Anyone allowed to create documents can post stock. If the automatic completion fails before any stock moves, the document goes back to Draft with the message "Saved as draft … Fix it and submit again."
- Approval on (Require approval for Stock In / Stock Out in Settings → Inventory settings): Submit stops at Submitted. Someone with confirm rights clicks Approve, then Complete.
- A Draft can be deleted. If you leave an unfinished entry, the device offers to restore it next time ("Continue your unfinished entry?"). A Submitted or Approved document can be cancelled with Cancel request, and no stock moves. A Completed document cannot be cancelled. It only allows Edit details.
- Numbers come from the warehouse, for example
MAIN/IN/00001andMAIN/OUT/00001.
Every line needs a reason, and "Other" needs a note. Typical reasons are Purchase, Sold, Damaged, Expired, Borrowed goods, Borrowed goods returned, and your own reasons from Settings → Stock documents. The warehouse must allow the direction. Products with variants and combos hold no stock, so choose a specific variant or the combo's components.
Click Edit details on a Completed document to change the reason and note or the purchase supplier, or to link a purchase order to a purchase stock-in that was posted without one. Products, quantities, and tags stay as posted, and the ledger keeps the original reason. Linking records the posted quantities as received on that order. Only open orders for the same warehouse that include every product are offered. Do not reverse a stock-in just because the order was missing. Link it instead.
Receive goods with a stock-in
The full purchasing flow is in Purchase and receive. The document itself works like this:
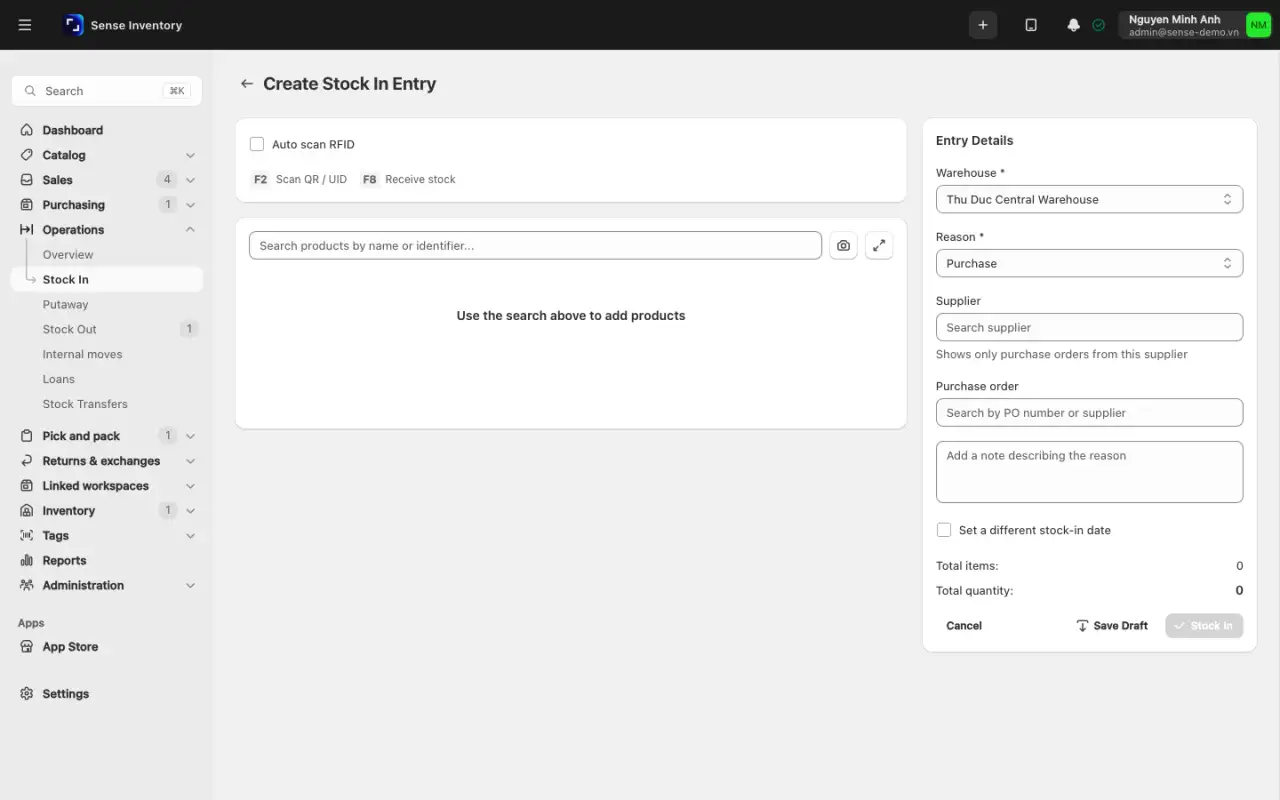
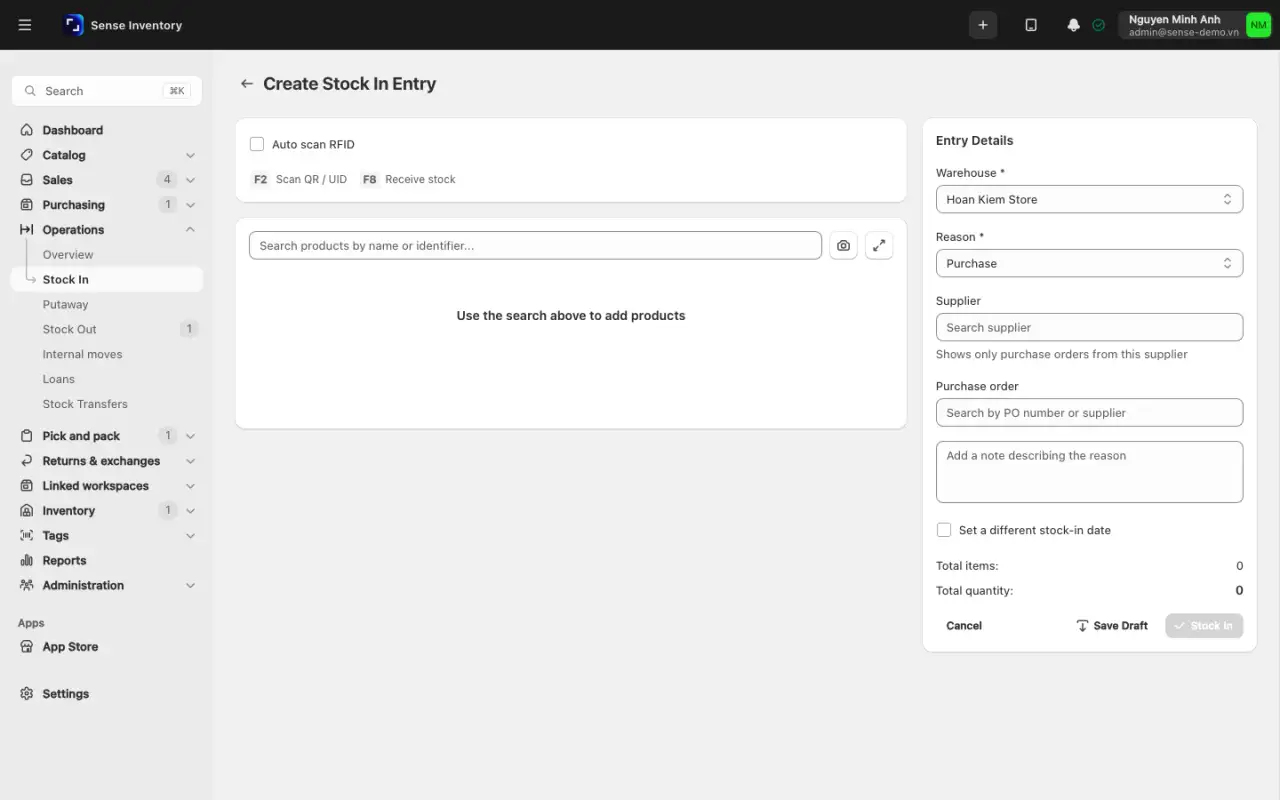
Open Operations → Stock In (Stock Operations → Stock In on the classic layout) and click New stock in. A draft opens on the warehouse you used last.
In the right sidebar, pick the Warehouse and Reason. For Purchase, also pick the Purchase order. Set Inbound date only to backdate the receipt. Leave it blank to record the completion time. A future date is refused.
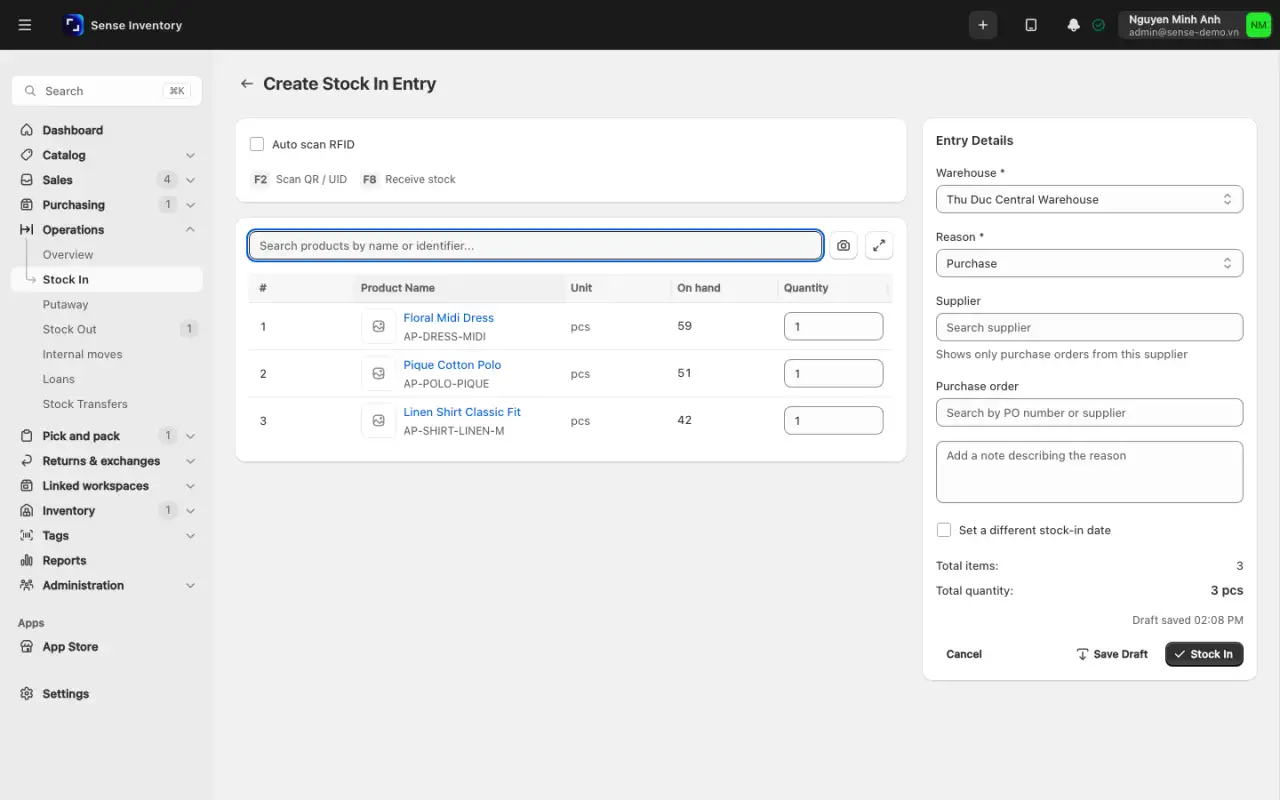
Click Connect reader and Start scan, or search for products and type quantities. For batch-tracked products, enter the batch or lot and its expiry on every line. If bin tracking is on, scan a bin first and the next products go into it. Fill in Additional information if it is shown.
Click Complete, or Save Draft to finish later. With approval off you see "Stock-in request created successfully".
For tagged goods, the number of tags must equal the line quantity, and the same tag cannot appear on two lines.
Issue stock outside of sales
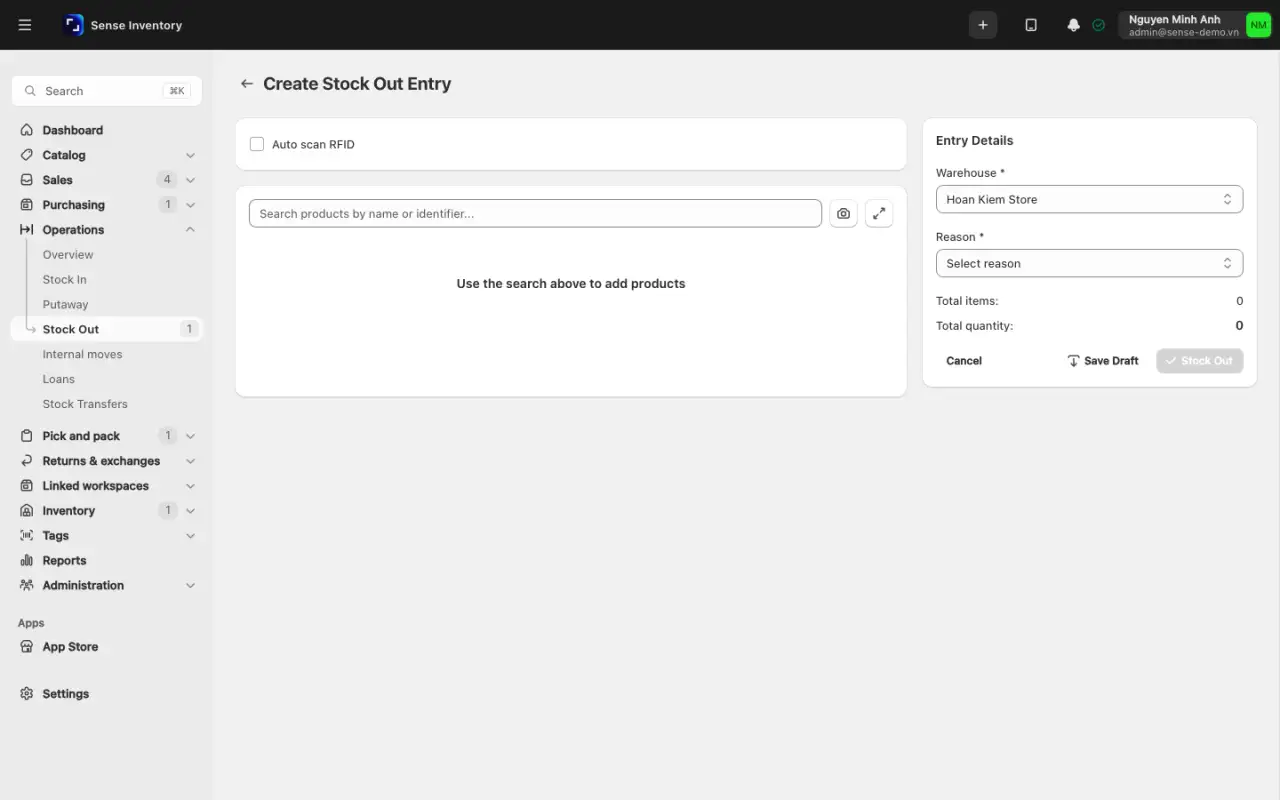
Use Operations → Stock Out (Stock Operations → Stock Out on the classic layout) whenever goods leave without a paying customer: damage, expiry, supplier returns, loans, or internal use.
Check the source warehouse first. The system fills in the last one you used.
Pick the Reason that matches what happened: Damaged, Expired, Returned, Lost, Borrowed goods, or another. Later, that reason is the only record in the ledger of why the goods left.
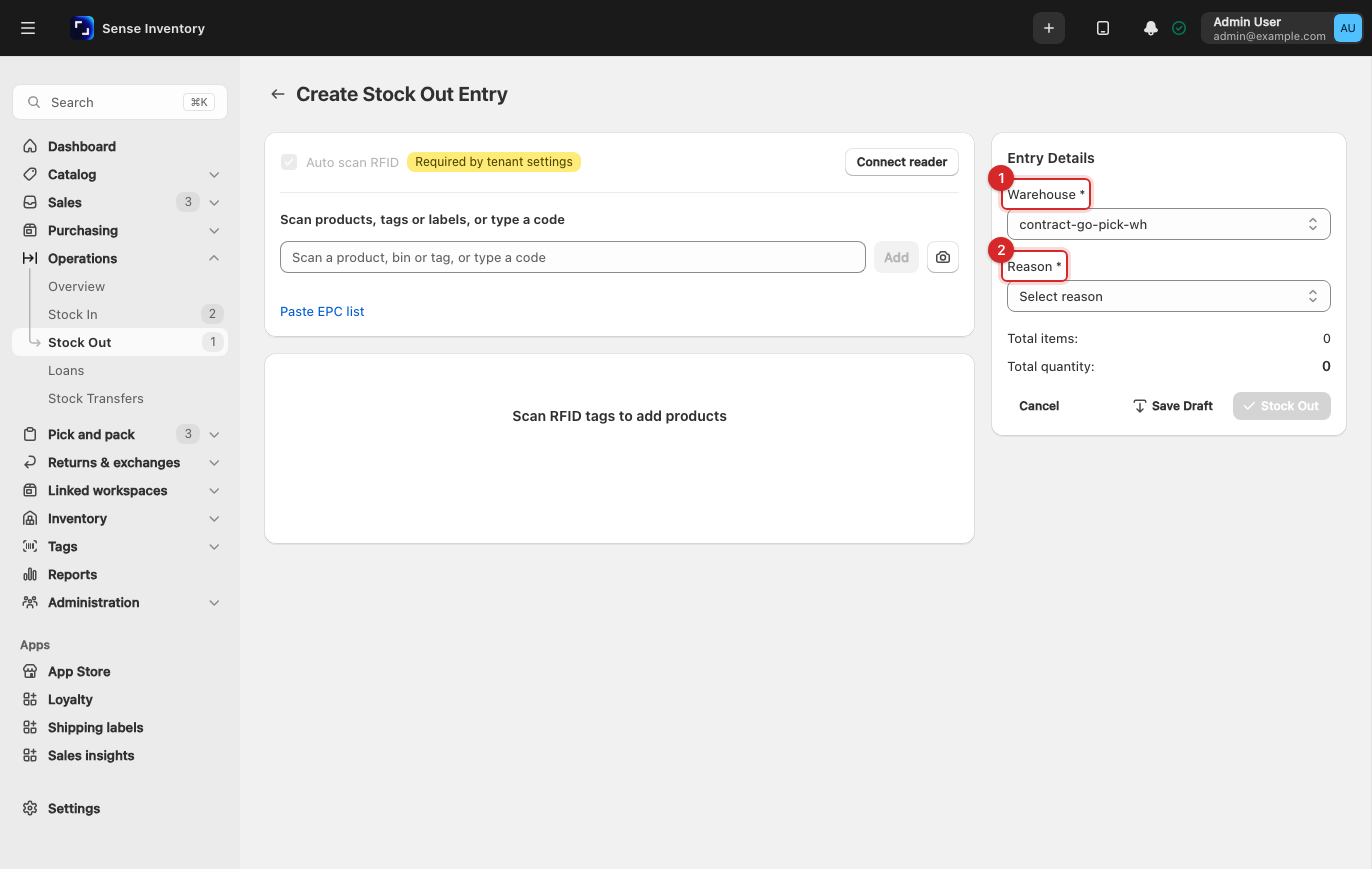
Add the lines. Search by name or SKU and enter quantities. For RFID-tagged goods, scan the tags of the exact items leaving, so each item's history stays correct. A carton label moves every unit inside it. A scan that sees only part of a closed carton is refused.
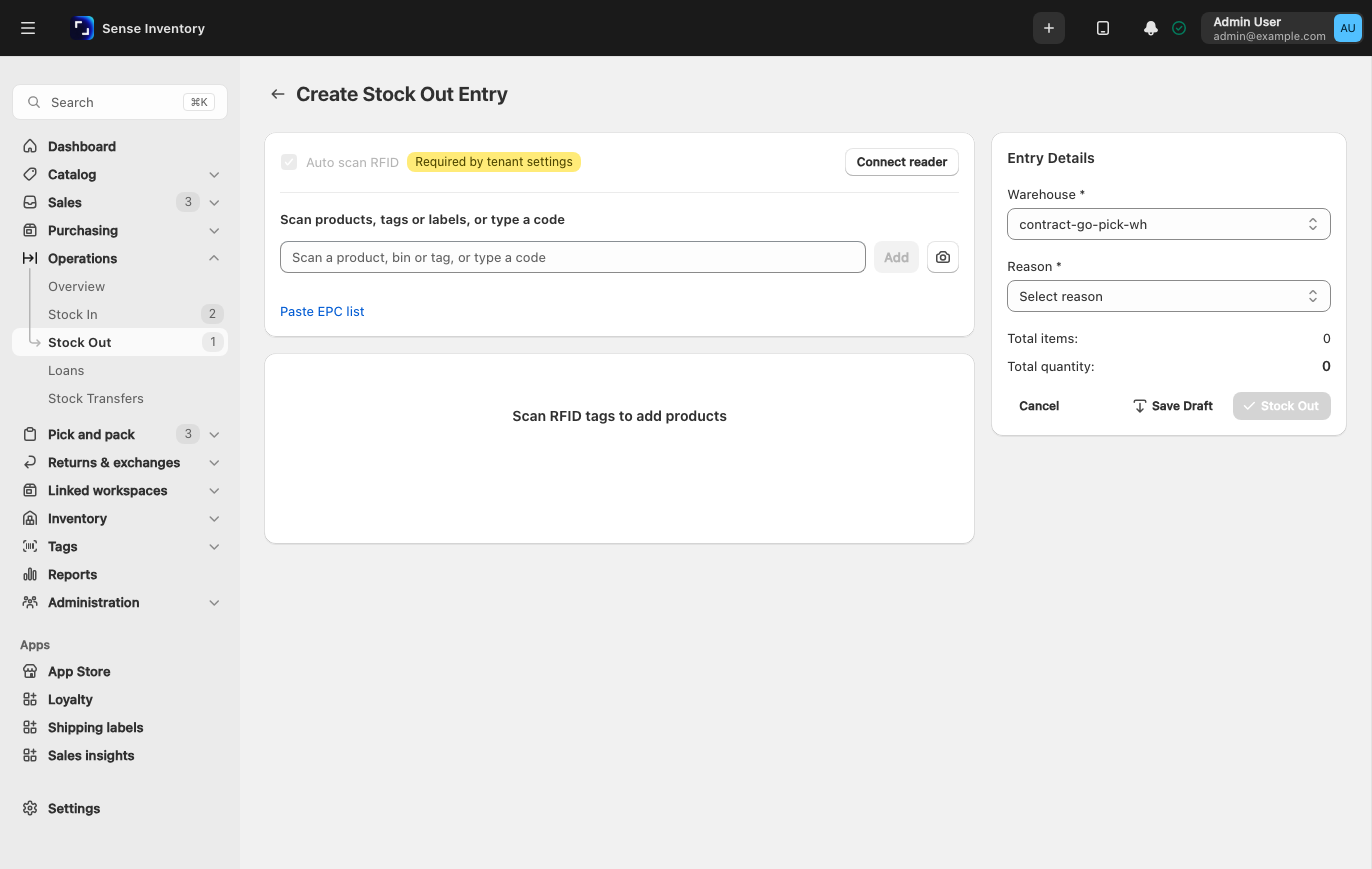
Compare the list on screen with the goods in front of you, remove any wrong line, then click Complete. If Auto-detach RFID on manual Stock-Out is on, you are asked whether to detach the tags so they can be reused.
The balance must cover the quantity unless Allow overselling is on. Lines with specific EPCs are always checked.
To create a stock-out from a file, click Import stock out. Choose the warehouse, the reason (Sold by default), and the file. The file has the columns Code/SKU/Barcode, EPC, Quantity, and Note, with at most 2,000 rows and 10 MB. Download template gives you the layout. Click Check file. The whole file must be valid, so fix every row with an error. Then click Create stock-out draft, review it, and click Submit.
Approve and complete a document
When approval is on, a Submitted document waits for someone with confirm rights.
Open the document from the Stock In or Stock Out list, or click Review pending on the dashboard banner.
Click Approve, then Complete, and confirm "Complete stock request?". Or click Cancel request and give an optional reason. The request is voided and no stock moves.
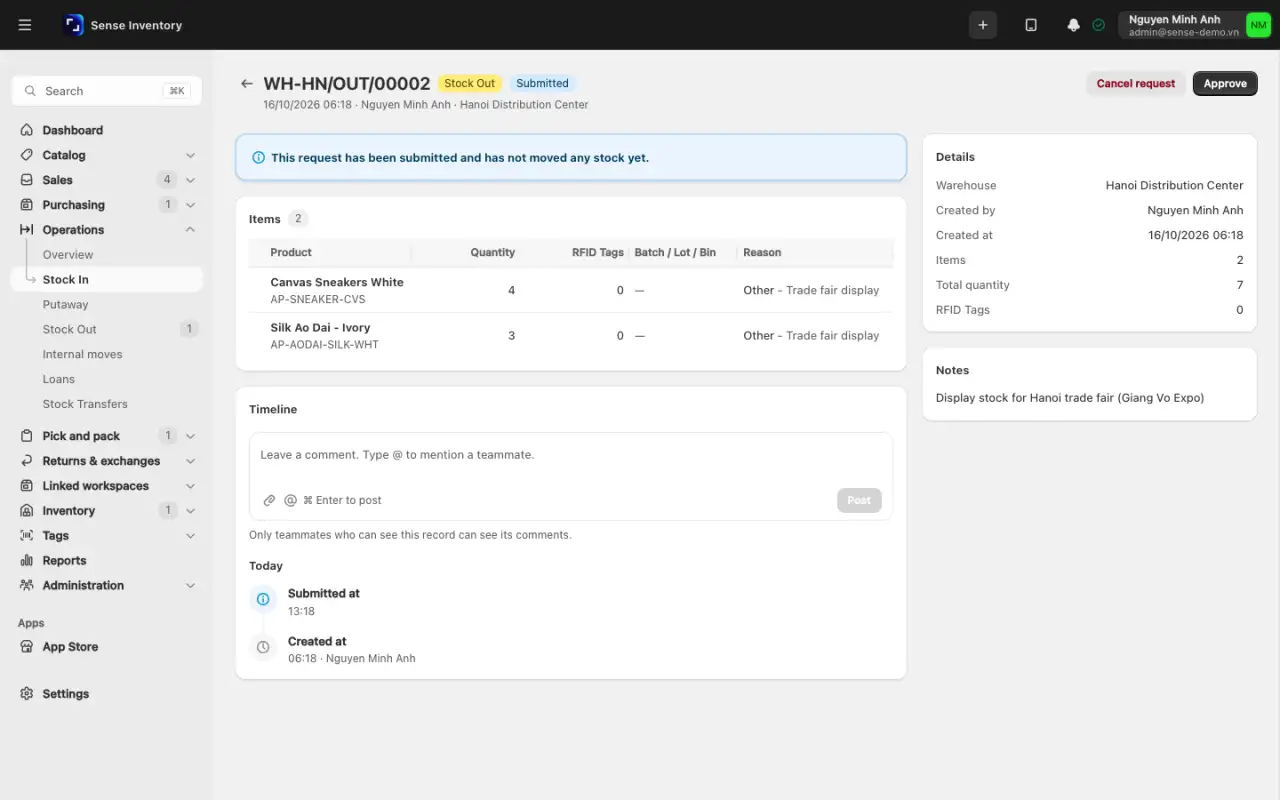
Completing re-checks the document, writes the ledger lines, and updates tag statuses in one step. Until then, the document shows "This request has been submitted and has not moved any stock yet."
Lend goods and take them back
A loan is a completed stock-out with the reason Borrowed goods. It needs Lend goods to be on in Settings → Features.
Open Operations → Loans (Stock Operations → Loans on the classic layout) and click Lend goods. A stock-out opens with the reason Borrowed goods.
Fill in Borrower customer, Loan days (a whole number of 1 or more), and Recovery owner, the staff member responsible for getting the goods back. Scan the goods and click Complete. The due date is the issue date plus the loan days.
To take goods back, click Return on the loan row. A stock-in opens with Borrowed goods returned, the borrower, and the Original borrowed issue filled in. You can also find the loan by scanning a tag. Tagged lines must return exactly the tags that were lent, and no line can return more than is still out. Click Complete.
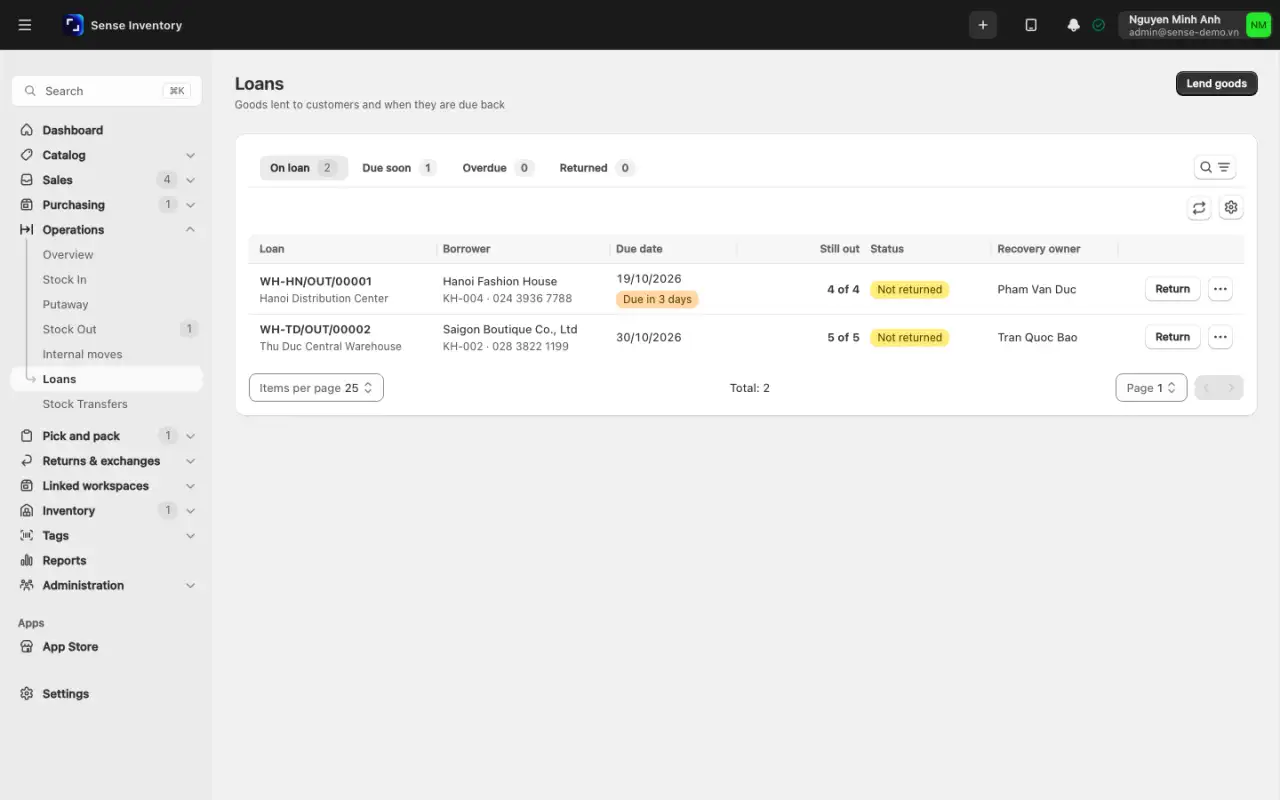
To change the due date, open the row menu, choose Extend, pick a New due date, and click Extend. If goods will not come back, choose Report lost, select the lines or tags (or Select everything left), and click Report {quantity} lost. The tags are retired. Stock does not change again, because the loan already took the goods out. Print receipt prints a loan receipt for the borrower to sign.
A loan appears under Due soon from 3 days before the due date and under Overdue after it. Its return status goes from Not returned to Partially returned to Returned, or to Closed with loss if any units were reported lost. With Due date reminders on, the recovery owner is notified in the days before the due date, on the day, and the day after. A tag that is still on loan cannot be received in a normal stock-in, and Lend goods cannot be turned off while loans are open.
Transfer goods between two warehouses
A transfer only changes location. The company's total stock stays the same, and tagged items keep their tags. While the goods are on the road, they belong to neither warehouse:
Open Operations → Stock Transfers (Stock Operations → Stock Transfers on the classic layout) and click New Transfer.
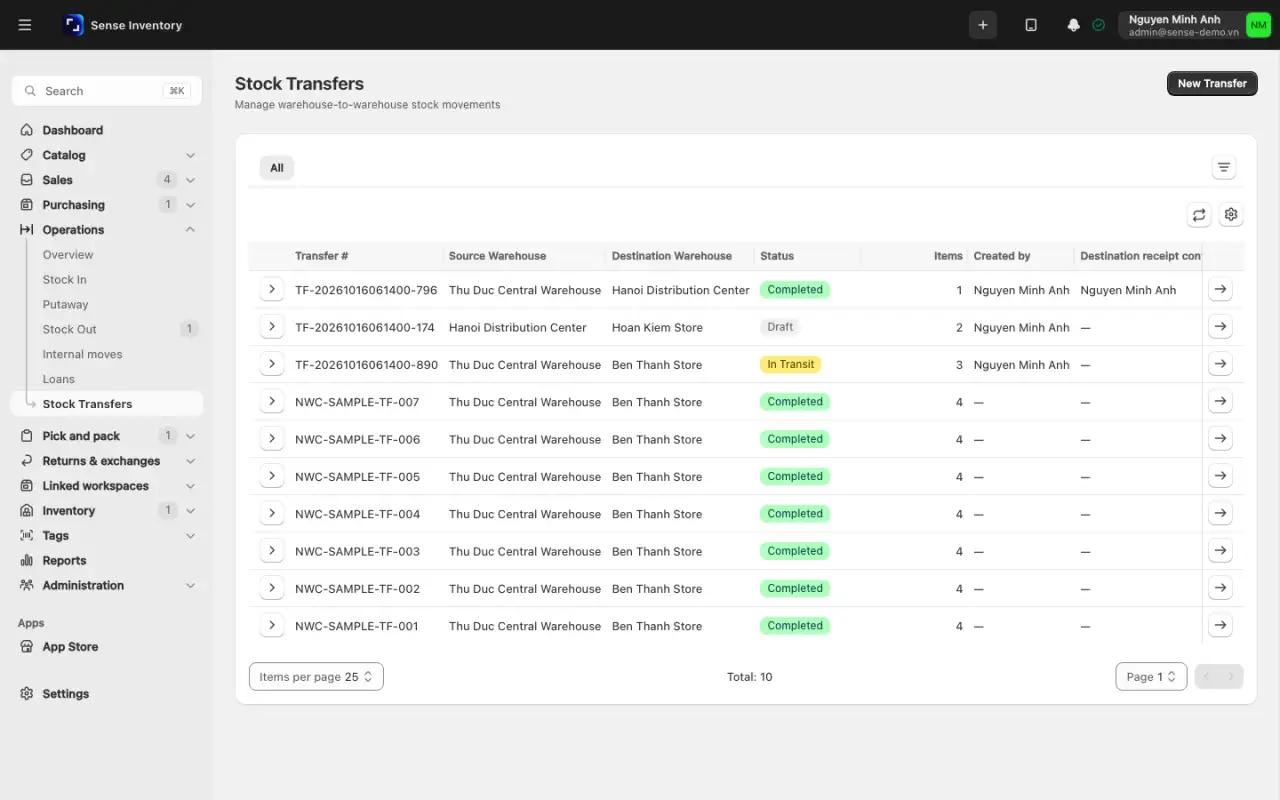
Pick the Source Warehouse and Destination Warehouse. They must differ, the source must allow stock out, and the destination must allow stock in. To move goods between bins inside one warehouse, use Relocate stock between bins on the stock screen or an internal move (see below), not a transfer. For bin setup, see Catalog and warehouses.
Add lines by product, or turn on RFID and scan tags. Scanned tags are grouped by product, and a tagged line's quantity always equals its tags.
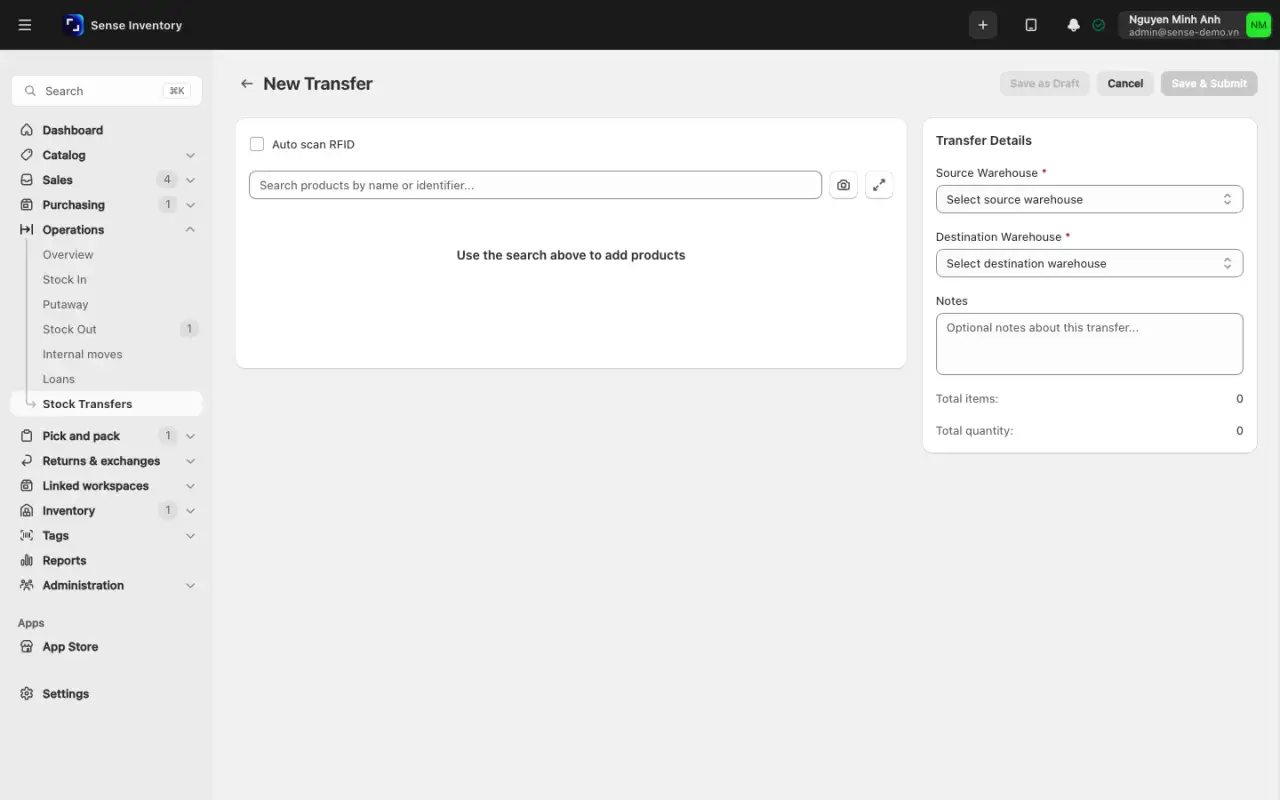
Click Save & Submit, or Save as Draft to keep it. A draft does not touch stock. Source stock is checked when you submit, not when you create the draft, so a draft can be blocked later if the goods sold out in between. Submitting takes the stock out of the source at once.
Optionally click Dispatch on a Submitted transfer. The badge changes to In Transit and records who dispatched it and when. No stock moves. You can skip this and confirm receipt straight from Submitted.
At the destination, open the transfer and click Confirm Receipt. Only then does the destination's stock rise. Until then the goods belong to no warehouse, so total stock looks short by exactly the amount on the road.
Operational guidance
Check for pending transfers before every stock count. When total stock looks short for no obvious reason, look first for a transfer that has not been received.
Confirm receipt
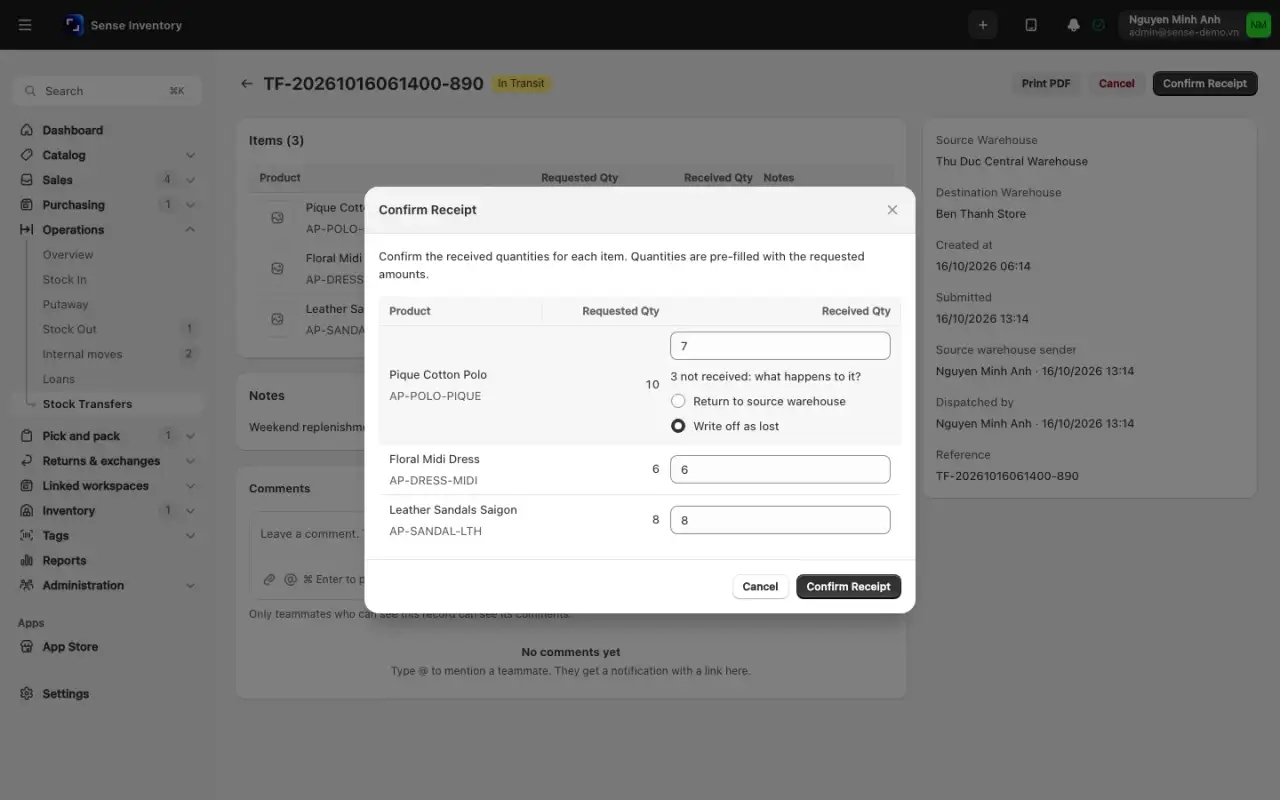
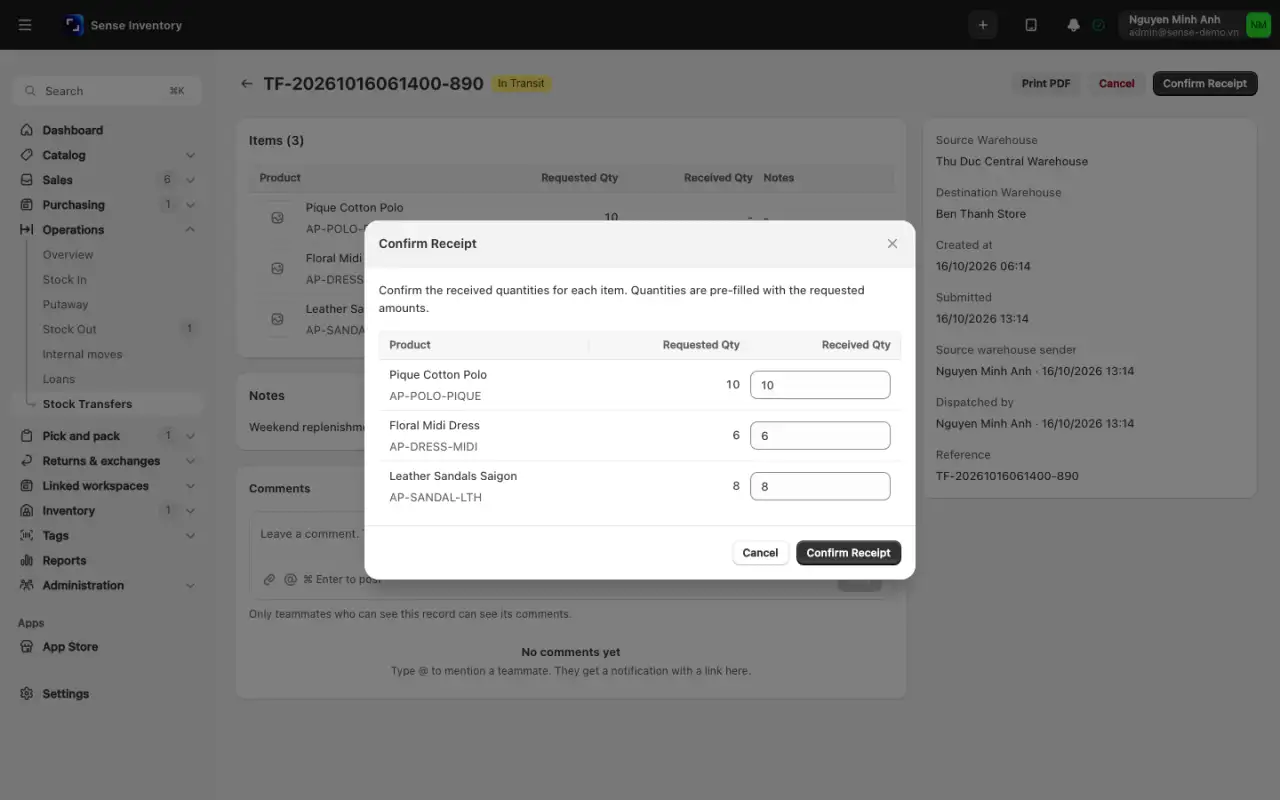
Lines without RFID: adjust Received Qty. It starts at the requested quantity, which is also the maximum.
Short lines: for each short line, choose Return to source warehouse or Write off as lost. Confirm Receipt stays disabled until every short line has a choice. Returned goods go back to the source in the same batch and bin. Written-off goods are booked as a loss, so they appear in the loss reports.
RFID lines: scan the goods. The dialog shows "Matched: X. Missing: Y. Unexpected: Z." Remove a tag listed under Unexpected EPCs with Remove from scan, scan the missing ones, stop the reader, then click Confirm Receipt. RFID lines are all or nothing: every tag sent must be scanned, with no extras, so they never have a shortfall.
If a tag is missing and cannot be found, cancel the transfer and create a new one. If the destination uses two-step receiving, a putaway task is created for the received goods.
Cancel a transfer
Open the transfer, choose Cancel in the more actions menu, and optionally enter a Cancellation Reason. Stock that left the source goes back to the same batches and bins, and the tags return to Active. A Completed transfer cannot be cancelled. Create a transfer back instead.
Put away and move stock between bins
Larger warehouses work in tasks under Operations. Putaway and Internal moves appear only when Batch / lot tracking and Bin tracking are both on. Each task is a document with a number such as WH1/INT/00003, a status, and a Demand against Done comparison.
Put stock away. Open Operations → Putaway, tab By document. If a banner says "N product lines have no bin", click Put away stock without a bin. Open the putaway and scan the destination bin, then the products or tags, or click Use N suggestions to accept the suggested bins. Click Validate.
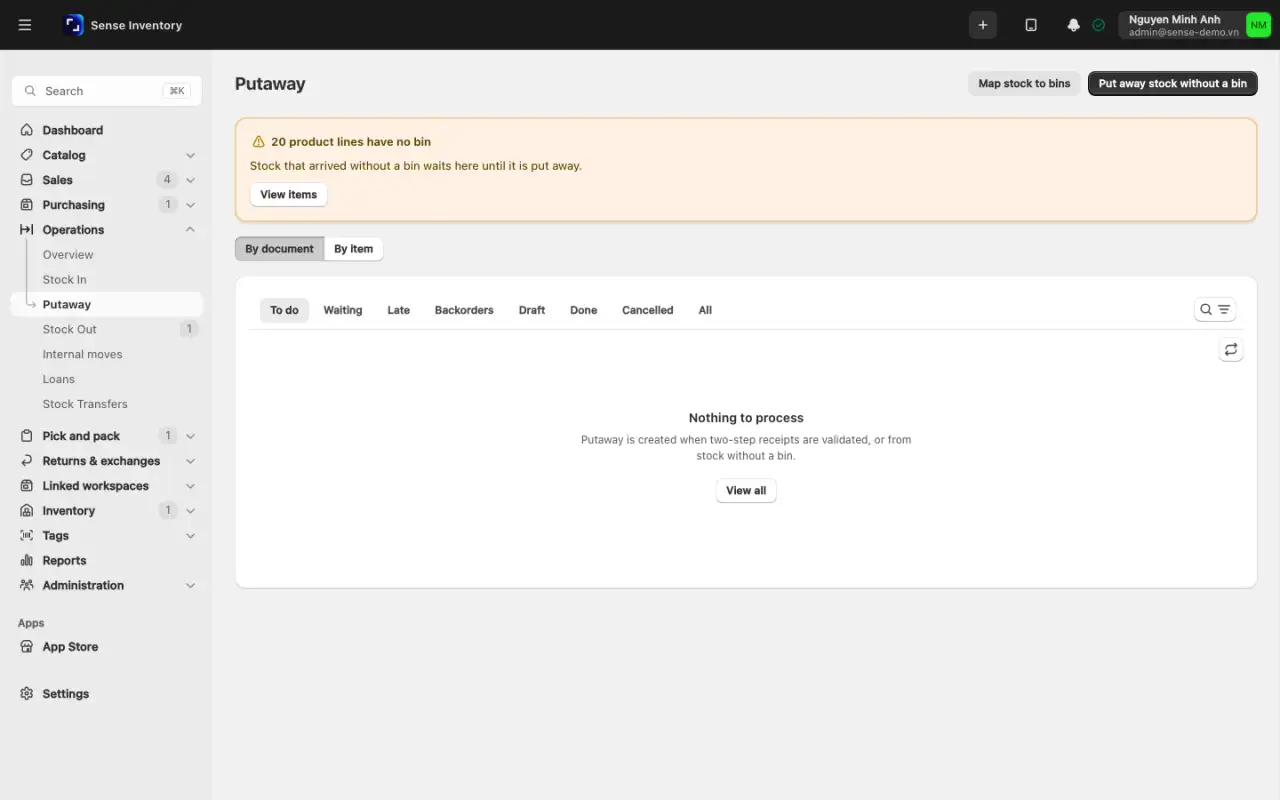
With two-step receiving (Inbound steps on the warehouse Overview tab), validating a receipt creates a ready putaway automatically.
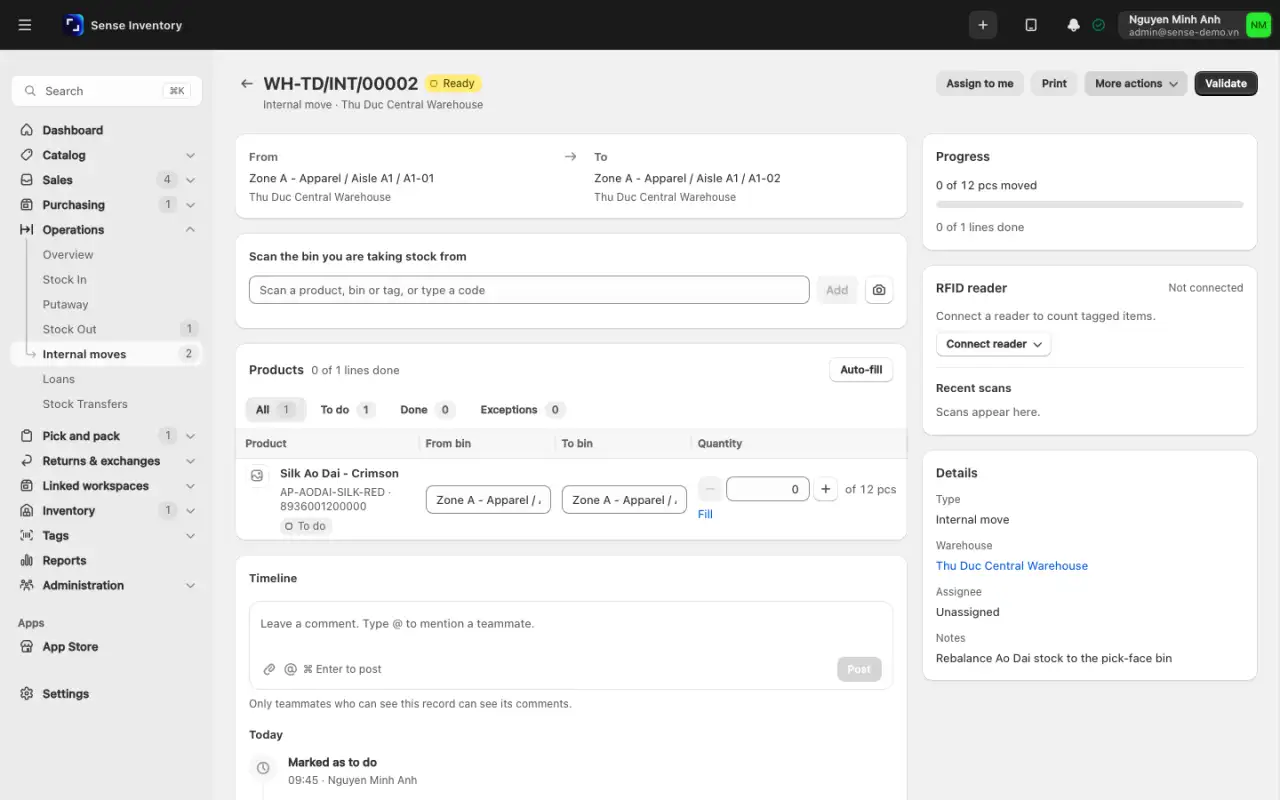
Move between bins. Open Operations → Internal moves and click New internal move. Choose the warehouse, optionally a From bin and To bin (they must differ), and click Create and start. Scan the bin you take from, then the bin you put into, then the products or tags. Click Validate. The warehouse total stays the same. Only the bin changes.
Map existing stock to bins. Open Operations → Putaway and click Map stock to bins. Scan the bin, then the products or tags in it, and validate. You see "N items mapped to bins, on-hand unchanged."
Short receipts. When you validate a receipt or delivery with short lines, a dialog "Create a backorder?" offers Create backorder (the rest moves to a new document) or No backorder (the document closes short), depending on the operation type's Short operations setting.
A warehouse with bin tracking needs at least one bin before putaways, internal moves, and maps can be created. Otherwise you see "This warehouse has no bins yet. Set up its layout…". Orders that already have reserved stock must ship from their pick list, not a stock-out. If approval is on, validating a receipt or delivery needs confirm rights. Others click Request validation. Cancelling an operation never touches stock, and validating twice never posts twice.
Handle goods measured by weight or length
Products stocked by the bag or roll at a measured amount use Pack mode (variable quantity). Each bag has its own tag and its own quantity, such as 1.235 kg.
Turn it on in the product form with Pack mode (variable quantity), optionally with Default quantity per tag. For several products, select them in the list and use Batch / Pack → Enable pack.
To receive bags, add the product to a stock-in. In Measure bags: {product}, set the lot, expiry, and Tare per bag, scan tags or click Add bag, and type each bag's quantity from the scale. If you enter a tare, the number you type is the gross weight and the stored quantity is the net. Click Done, then submit.
To ship or cut bags, scan them on a stock-out. In Ship bags: {product}, lower a quantity to ship part of a bag. The remainder stays on the same tag. Shipping the whole bag uses it up.
To list the bags of a product, open Inventory → Stock Levels (Inventory & Audit → Stock Levels on the classic layout) and click the "{count} packs" link on its row.
To pack from bulk stock, set a Bulk source warehouse (Source warehouse (bulk) in the app). The packed total moves out of untagged stock into tagged stock. The bulk used and the packed total can differ slightly. Pack variance tolerance in Settings → Features ignores differences up to that value, in the product's base unit. At 0, every difference is posted.
Void a pack
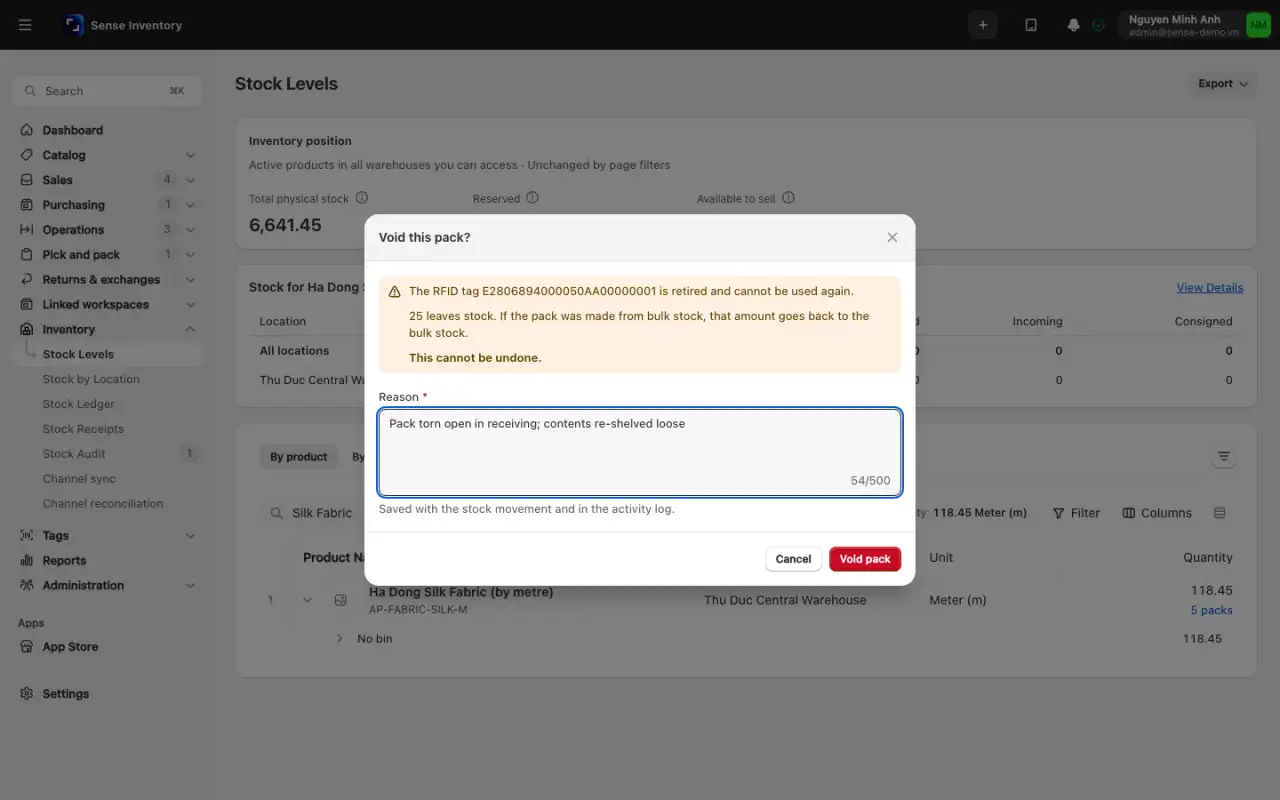
Voiding retires the pack's tag permanently and cannot be undone. It needs a role permission.
- Scan or type the EPC in Check Item and click Void pack in the Traceability card. You can also click Void pack in the packs list in Stock Levels.
- Read the dialog. A pack in stock leaves stock. If it was made from bulk, the amount goes back to that bulk stock. A pack already shipped or used up changes no stock. Only the tag is retired.
- Enter the required reason and confirm.
Adjust when a number is already wrong
An adjustment overrides a number because it is wrong. Use it last, after you have checked the source document, the ledger, the tag history, and count results. There are three correct paths:
- A difference found while counting: settle it in the count with Finalize & Adjust stock, so every correction stays linked to a counted session, see Count and reconcile inventory.
- A one-off error on a completed document, such as one over-received line: create a new stock-in or stock-out entry with the Adjustment reason and a note that names the original document number. Do not try to overwrite the old document. The original and the correction belong in the ledger together, or nothing can be traced later.
- A wrong quantity or lot on one bag, or wrong dates on one ordinary tag: open it in Check Item, click Edit inventory, change the values, enter the required reason, and click Save adjustment. An ordinary tag always stands for exactly one unit, so only its lot and dates can change. A bag's quantity can change.
Operational guidance
Have a manager review large or repeated adjustments in the same warehouse. A steady stream of adjustments usually points to a broken process, not random errors.
Read the Stock Ledger when tracing
The ledger only grows. Nobody edits or deletes a line. A mistake is corrected with a new line that reverses it. Inventory → Stock Ledger (Inventory & Audit → Stock Ledger on the classic layout) records every movement in order, with the running balance after each line. The Action Type column says where a line came from, for example Stock in, Stock out, Transfer, Adjustment, Audit adjustment, Reserved for order, or pack lines.
Choose the date range, warehouse, products, and reason to isolate the movements you need.
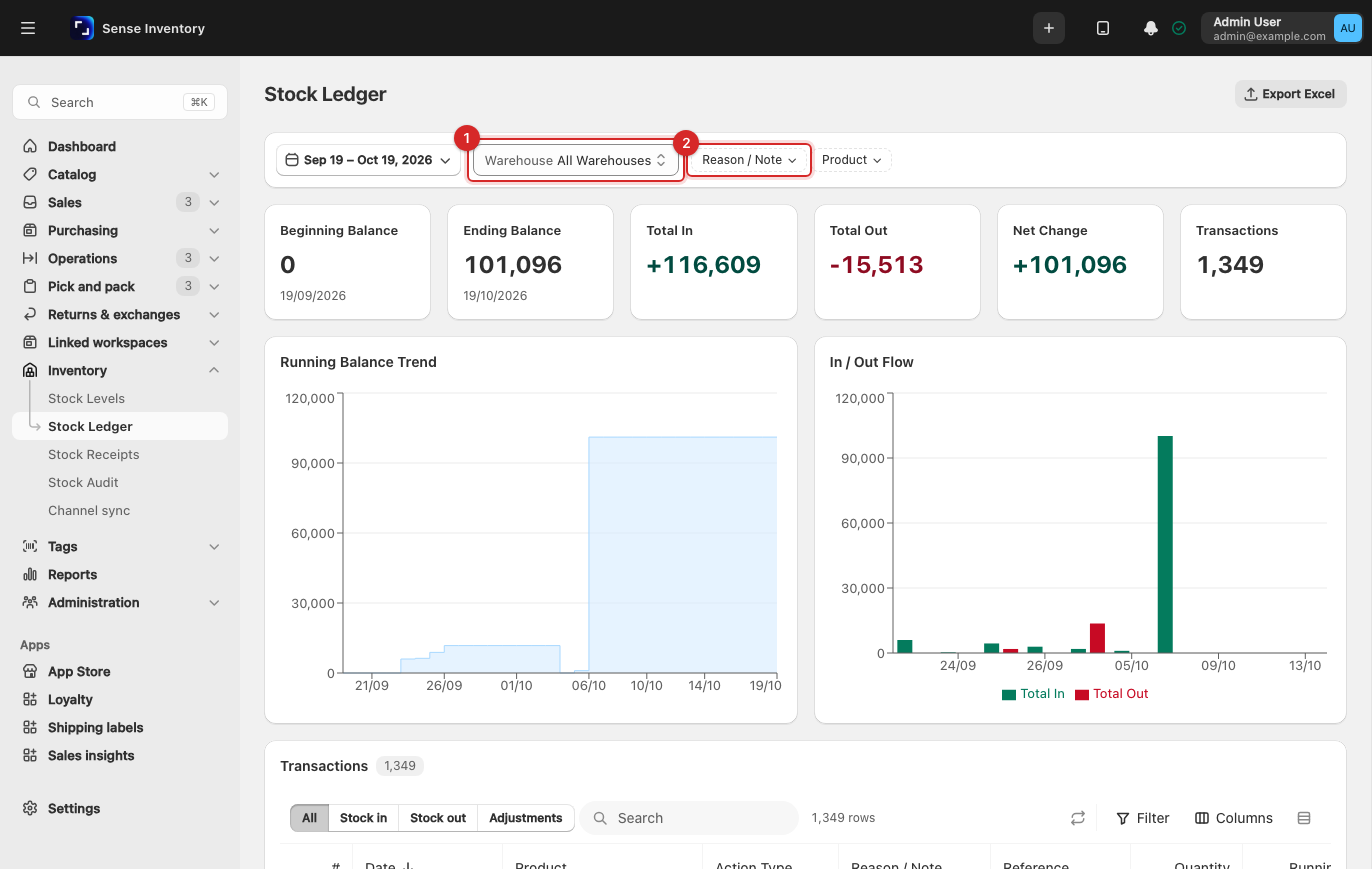
Read Total In and Total Out, the balance chart, then the Transactions table with the tabs Stock in, Stock out, and Adjustments. Click Export Excel to download the history.
When the balance disagrees with a physical count, find the last point where the number was still right and read forward line by line from there.
To trace one tag, open Stock Receipts, click Find by EPC, enter the EPC, and click Search. To find the document a tag moved on, type part of the EPC into the EPC filter on the document list. Stock Receipts also exports receipts. Tick Show released reservations to include released order holds. A parent warehouse includes its child warehouses.
The low-stock warning fires once, when the balance drops from at or above the product's Min Stock Level to below it. It fires again only after stock has returned to at least the minimum and dropped below it again.
If Allow overselling is on, the ledger can go below zero. A negative number is then the real state, not corrupted data: something was sold before it was received.
When something goes wrong
| Symptom | Likely cause | What to do |
|---|---|---|
| A warehouse cannot be selected | Its stock-in or stock-out capability is off | Fix the warehouse Capabilities, see Catalog and warehouses |
| A quantity is rejected: "Insufficient stock" | Not enough available stock and Allow overselling is off | Check physical stock. Turn on overselling only if the company accepts negative balances |
| "Enter a reason." or "Enter a note for this reason." | The line has no reason, or the reason is "Other" without a note | Pick a reason and write the note |
| "Select a specific product variant instead of the master product" | A product with variants was chosen | Choose a specific variant |
| A batch-tracked line is rejected, mentioning a batch to sell | The line has no batch or lot | Enter the lot number on that line |
| "RFID is required for stock operations" | Require RFID for Stock In / Stock Out is on and the line has no tags | Scan the tags. Typed quantities are not accepted |
| "A tag is still on loan." | The EPC is on an open loan | Receive it with a Borrowed goods returned stock-in |
| "Lending is turned off." | Lend goods is off | Turn it on in Settings → Features |
| A transfer cannot be created | Source and destination are the same | Pick two different warehouses. Within one warehouse, use Relocate stock between bins |
| Submitting a transfer reports missing stock | Source stock dropped since the draft was written | Recheck quantities against current stock and submit again |
| "Consigned stock cannot be transferred between warehouses" | The lines belong to an unsettled consignment agreement | Settle the consignment first, see Debt and consignment |
| "EPC … is already on pending transfer" | The tag is still on another open transfer | Receive or cancel that transfer first |
| "Received EPCs must match all transferred EPCs" | A tag is missing or unexpected | Scan the missing tags and remove extras. If one is lost, cancel and recreate the transfer |
| Total stock looks short | Transfers are still on the road | Open the transfer list and receive the pending ones |
| The destination does not see the goods | The transfer was never completed at the destination | Have the destination confirm receipt |
| Stock unchanged after an issue | The document is still Submitted | Someone with confirm rights approves and completes it from the Stock Out list |
| "This warehouse has no bins yet" | Bin tracking is on and no bin exists | Set up the layout in Warehouses first |
Read next
- Count and reconcile inventory: settle differences in a controlled count.
- Purchase and receive: the opposite direction, goods coming in.
- Review reports: the Stock In-Out-Balance report confirms the ledger adds up.
Do this on mobile
The Sense Inventory app can do this job on a phone or the handheld. Stock In and Stock Out take scans and submit with Submit Stock In. A request made offline waits and is sent when the device reconnects. Loans has the same tabs and Return goods opens a stock-in. Transfers creates a draft, then each row offers Submit, Dispatch, Receive/Complete and Cancel, with the same return or write-off choice for short lines. Operations has Tasks, Put away and Internal moves, and Move moves stock between bins directly and works offline. Packing makes packs, and Stock Ledger and Stock Levels show the history. See Use the mobile app and Connect a reader to the app.