

Create the catalog and warehouses
This page lays the foundation for everything that follows. Stock-in documents, the POS screen and reports all pick from the products and warehouses you create here. With no products, a stock-in document has nothing to add. With no warehouses, goods have nowhere to arrive.
Settle two decisions before you create the first product, because they are hard to change once stock is on hand: which Base unit the goods count in (piece, box or kg), and whether to turn on Track batches / lots. If you are unsure about batches, read Set up the system first.
Products, variants, and the different codes
Get the data model straight before you enter data. Data entered at the wrong level is the hardest mistake to unwind.
- Product Categories are groups for filtering and reporting. They form a tree, so a category can have subcategories. Each category name must be unique. For example: Shirts, Trousers, Accessories.
- A Product is a model you sell, such as "Crew-neck t-shirt".
- The Product Identifier is the product's own key and must be unique. Keep Auto ticked to let the system generate it.
- A Variant is what the system actually counts. Every combination that needs its own stock figure is one variant: the black shirt in size M is one variant, the white one in size L is another. Do not split out variants for anything you do not need to count separately.
- The SKU is a code you choose and must be unique. The Barcode is optional but must also be unique, including the barcode of each conversion unit. Pick a SKU convention from day one, because a connected marketplace matches products by SKU. See Process channel orders.
- An EPC only exists with RFID: each physical item carries its own EPC. A hundred identical shirts share one SKU but carry a hundred different EPCs. See Manage RFID.
Create categories and products
Go to Catalog → Product Categories and create the categories you need. Click Create Category, or Import Excel to load up to 1,000 rows at a time.
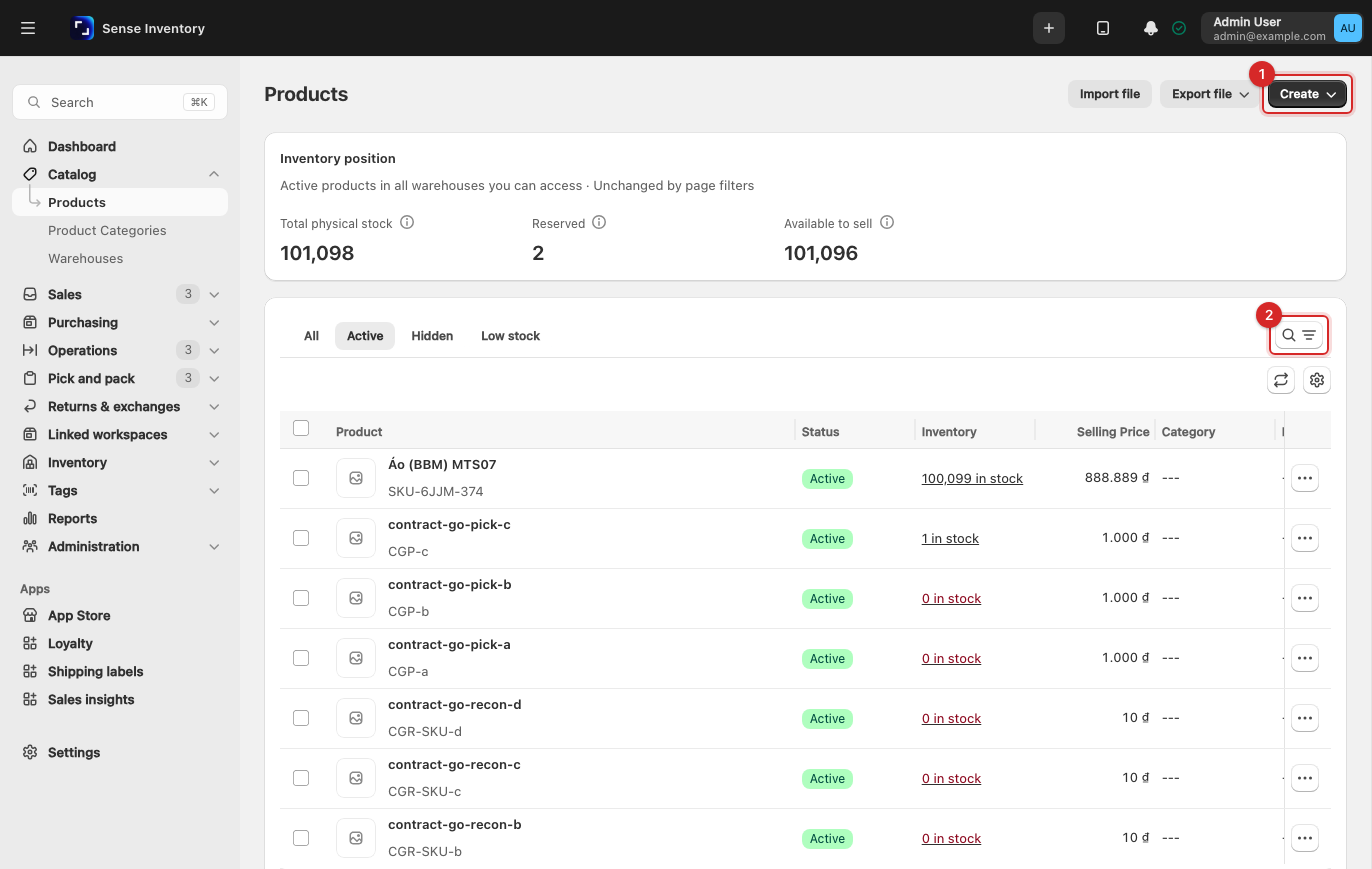
Go to Catalog → Products, click Create, then choose Create Product. Quick add opens a short dialog instead of the full form.
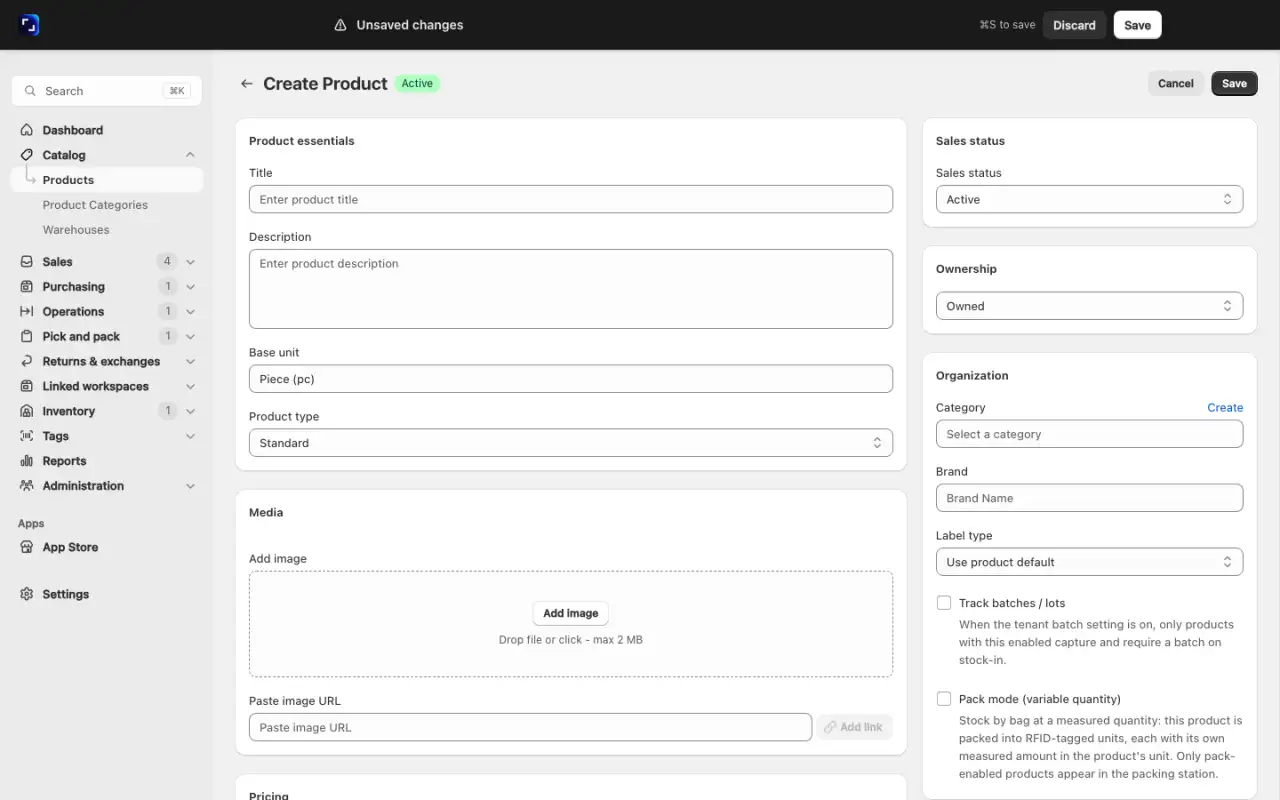
Under Product essentials, fill in Title and Base unit. Under Pricing, fill in Cost Price and Selling Price. Title and selling price are required. Optionally add a Sale price and a Tax rate.
Under Inventory, in Codes, enter the Product Identifier, SKU and Barcode if needed. Auto generate SKU, next to the SKU field, fills in a code. If another product already uses a code, the save is blocked and the message names the clash.
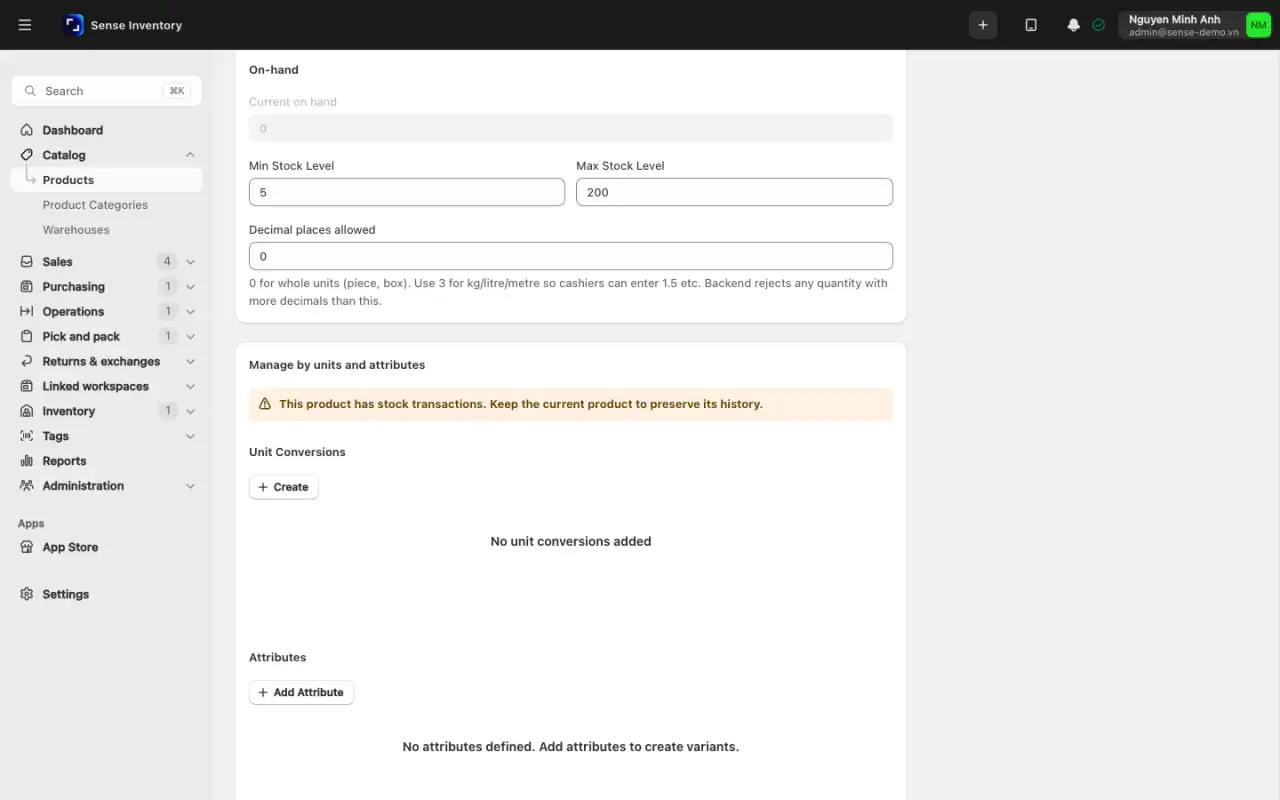
Optionally fill in Min Stock Level, Max Stock Level, Position and Weight. Under Organization, choose the Category, and turn on Track batches / lots or Pack mode (variable quantity) if the product needs them.
Click Save. You see "Product created successfully".
Do not leave Cost Price empty. Without it, profit reports show 0, and the mistake usually surfaces long afterwards. See Review reports.
Add conversion units and variants
Open the product and click Edit, or work directly on the create form.
Under Manage by units and attributes, in Unit Conversions, add any extra selling unit: Unit Name, Ratio (how many base units it holds, above 0), and optionally a barcode and price.
Click Add Attribute, for example Colour with the values Red and Blue. Press Enter after each value.
Click Generate Variants. You see "Generated {count} variants".
Click Save.
A product that already has stock transactions cannot gain variants: you see "This product has stock transactions and cannot gain variants." Variants have only one level. A variant takes its category, brand, base unit, batch tracking, pack mode and ownership from the master product.
If the plan limits the number of products, each variant also counts as a product. A new product with 5 variants uses 6 places.
Bulk import from a spreadsheet
For more than a few hundred codes, import a file.
On the Products screen, click Import file. Click Download template to get the template.
Fill your data into a copy of the template. Format the SKU and barcode columns as text, otherwise the spreadsheet strips leading zeros.
Click Choose file or drag in a .xlsx, .xls or .csv file. Each import takes up to 50,000 rows.
Choose the Product name column, the Update scenario and the Product order in the file. Update scenario has three options: "Update existing products & create new ones", "Only update products that already exist" and "Skip products that already exist (create new only)". Tick Create missing categories during import if the file names categories that do not exist yet (written as a path such as
Shirts/Men). Tick Create new custom attributes from extra columns if extra columns should become attributes.At the Preview step, read the summary "{total} rows ({valid} valid, {invalid} invalid)". Turn on Show only rows with errors to see only the rows with errors.
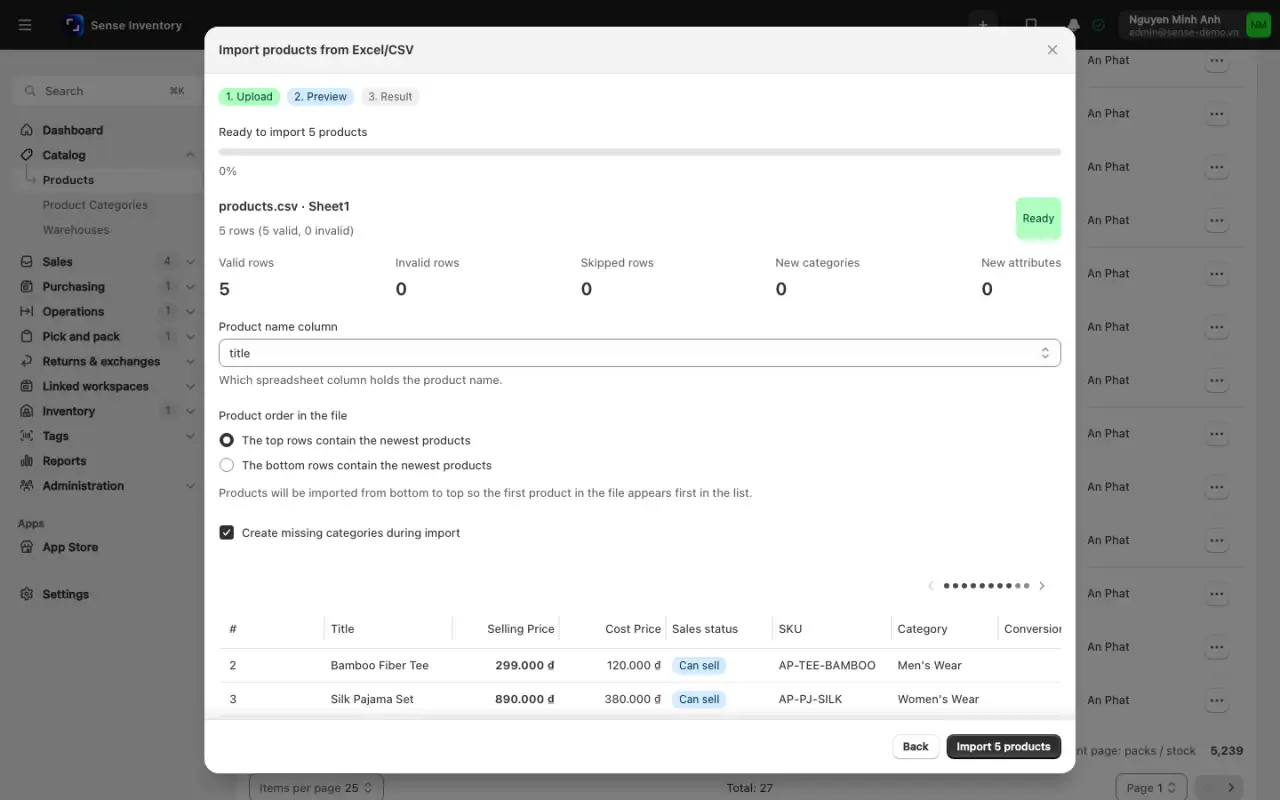
Click Import {count} products. The Result step reports "Created {created}, updated {updated}, skipped {skipped} products." Click Download error report if any rows failed.
Fix the failed rows in the source file and import again. Do not patch records by hand in the system, so the file and the data stay in step.
Blank cells in the file keep the current value. Each row is saved and reports its errors on its own, so one bad row does not reject the whole file. Rows marked inactive are skipped. After the import, open a few products and check SKU, variants, price and sales status.
If the plan limits the number of products and the file would go over the limit, the import is refused before anything is saved, with "Your plan's limit is reached".
Disable, re-enable, or delete products
- Open the row menu on the products list and choose Disable product, Enable product, Duplicate product or Delete. For several products, select the rows and click Disable or Enable.
- To bring disabled products back, open the Hidden tab, select the rows and click Enable.
A product, or any of its variants, with stock history cannot be deleted. You see "Cannot delete: this product (or one of its variants) has stock / scan history. Suspend it instead of hard-delete." Disable the product instead: it stays in reports but is hidden from search, POS and stock documents.
Turning a category off deactivates every active product in it. Turning the category back on reactivates exactly those products. A category with subcategories or products cannot be deleted.
A combo is a product made of a fixed list of other products, and it holds no stock of its own. Combos are off by default. Turn on Product combos under Settings → Features, then use Create → Create combo product.
Create warehouses and the location tree
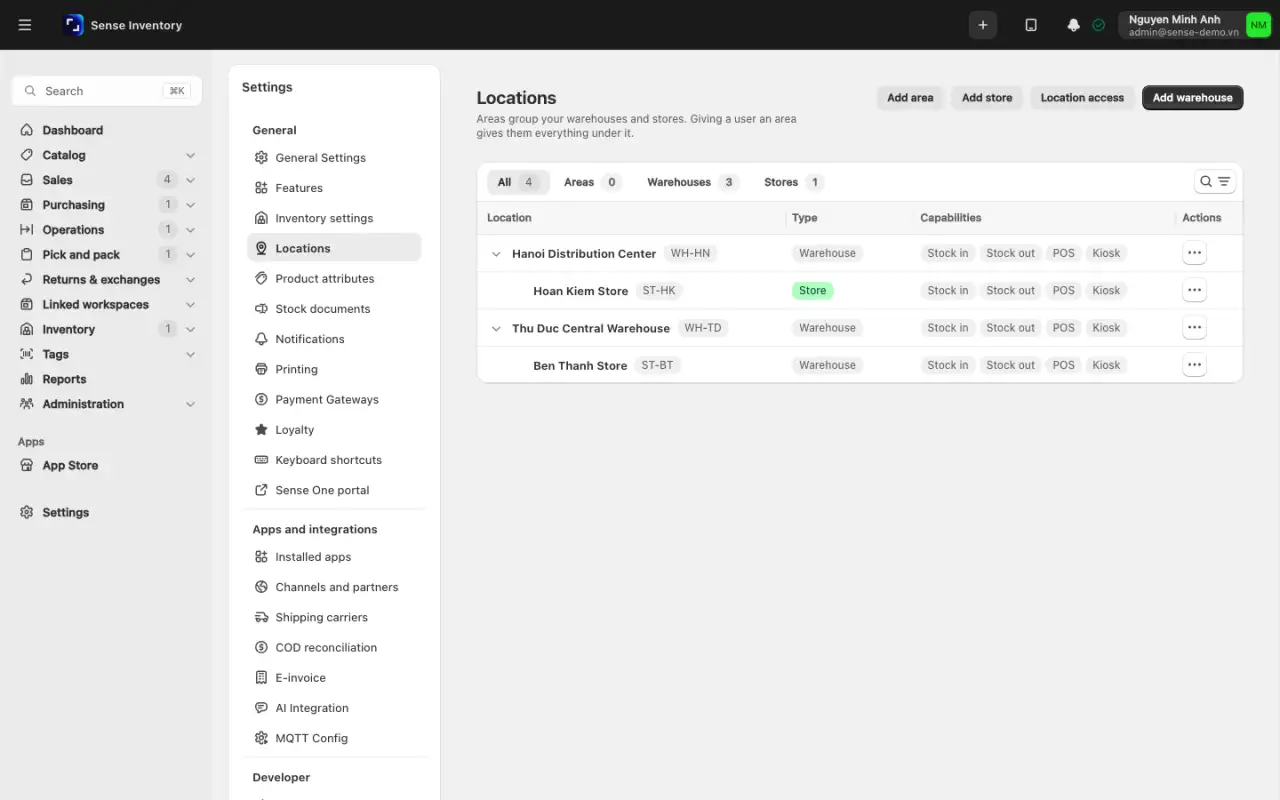
Go to Catalog → Warehouses and click Create Warehouse. The full tree is under Settings → Locations, with the tabs All, Areas, Warehouses and Stores. There you can click Add area, Add store or Add warehouse.
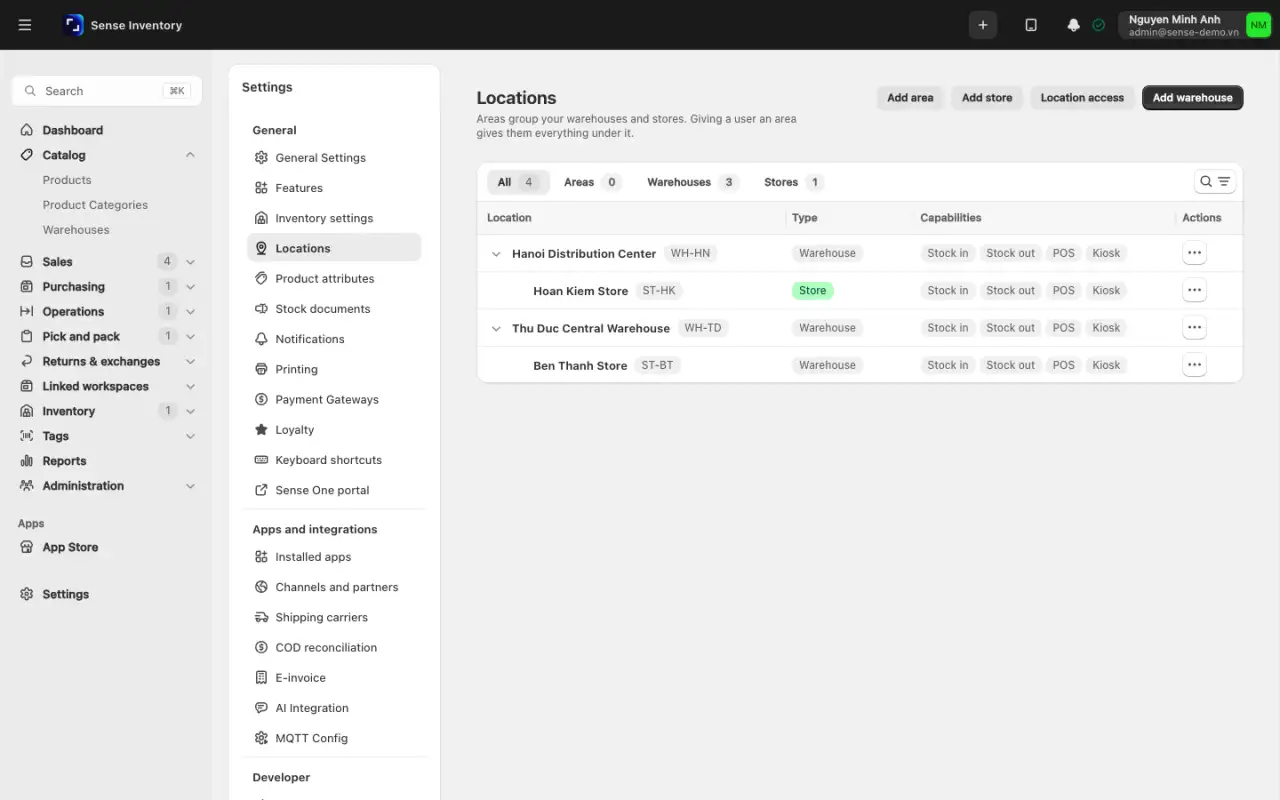
Enter the Name (unique across all locations), Description, Address, and a Parent Warehouse if this is a child location. Choose "None (Root Warehouse)" for the top level. Locations form a tree, for example a central warehouse with branch warehouses, or one shop with a display area and a back room. The tree is also the unit of access control: granting someone a location grants every location under it. See Users and security.
Choose the Location type: Area groups the warehouses and stores under it and holds no stock; Warehouse receives, stores and issues goods; Store sells over the counter. Optionally enter a Warehouse code (up to 64 characters). It starts the document references, for example WH1.
Choose the Capabilities: Stock In, Stock Out, Kiosk and POS. A location does not appear on documents for a capability that is off. An Area always has all four off.
If you ship from this location, fill in the Pickup address: Contact name, Phone, Province / City and Ward.
Click Save. You see "Warehouse created successfully".
A location with child locations, or with stock or order history, cannot be deleted, and you see "Failed to delete warehouse". Warehouses have no disable switch. The closest equivalent is to edit the warehouse and turn off all four capabilities. If the plan limits the number of locations, areas and stores count too.
Operational guidance
Use Capabilities as a safety catch. Turn Stock In off on a display counter that only sells, so nobody receives goods into it by mistake. Turn POS off on a transit warehouse that never sells.
Build bins inside a warehouse
Bins only work when both Batch / lot tracking and Bin tracking are on under Settings → Inventory settings. With bins on, a warehouse needs at least one bin before you can receive, put away or move stock. Otherwise you see "This warehouse has no bins yet."
Open the warehouse and go to the Layout tab.
If the warehouse has no bins yet, the Set up the layout page offers two choices: Open the bin generator (Recommended) or Import CSV.
In the generator, go through the Template, Ranges, Preview and Create steps. Choose a template ("Zone, aisle, level, bin", "Aisle, rack, shelf" or "Numbered bins"). For each level, set From, To, Digits and Separator. Set Capacity per bin and, if needed, Build inside and Zone role. Bin codes are compared without dashes and ignoring case, so
A-01anda01count as the same code.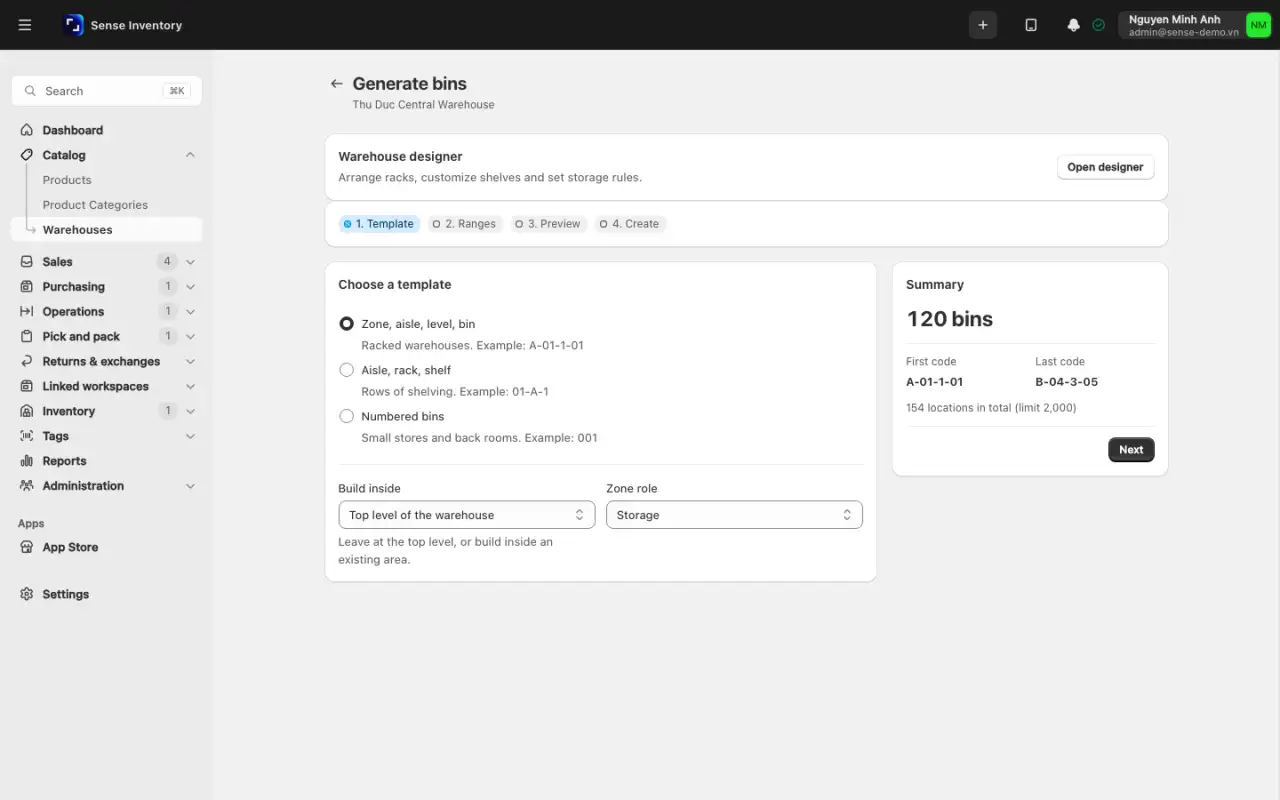
Click Create {count} bins. If some bins already exist, click Create {created} new, skip {skipped}. Each run creates at most 2,000 locations.
Click Print labels for {count} bins. For existing bins, use Print labels on the Layout tab. If bins have no code, click Generate codes and then Apply {count} codes. Nothing is saved until you apply. Under Format, choose A4 sheet (24 labels per page, 63.5 × 33.9 mm) or Thermal roll (50 × 30 mm), then print.
To load a layout from a file, click Import CSV on the Layout tab, then Download template. The file has the columns path, type, capacity, barcode and zoneType, with / between levels, for example Zone A/Aisle 01/A-01-1. Click Check. You see "{created} new, {updated} already there, {errors} with problems." Click Import {count} locations. Each import takes at most 2,000 rows.
Once bins exist, stock-in documents can put goods into a specific bin. To limit what a bin may hold, open the bin's row menu on the Layout tab and choose Location rules. Choose Block or Warn, add the allowed products, brands or categories, and click Save rule. Rules apply to receiving, putaway and internal moves, never to deliveries. A bin with stock cannot be deleted: move the stock out first. See Issue, transfer, and adjust stock.
For two-step receiving, open the warehouse's Overview tab, go to Receiving, and choose "Two steps: receive, then put away". Goods arrive in the receiving bin, then a putaway moves them into storage bins. If the warehouse has no receiving zone yet, click Create receiving zone.
Check the result
- Reopen a product: the variants, prices and cost price must be right.
- Open a trial stock-in document: the new warehouse must be selectable.
- Open the POS screen: warehouses with POS on must appear.
If a document does not offer a warehouse, check two things: whether the warehouse's Capabilities include that operation, and whether your account has been granted that warehouse. A warehouse outside your access reports "You do not have access to this warehouse. Ask an admin to grant it." Buttons you have no permission for, such as Create, Import file or Edit, are hidden.
Read next
- Purchase and receive: load opening stock into the warehouses you just created.
- Set up the system: what batch tracking, bins and the stock consumption order mean.
- Manage RFID: attach an EPC to every physical item.