

Manage users and security
You do not hand out permissions one by one, one person at a time. Permissions are bundled into roles named after real jobs, each person receives one or more roles, and a warehouse restriction narrows things further where needed. This page is for the administrator: build the role set, create accounts, turn on two-factor authentication, and audit who did what.
The access model
Three layers, each with one job:
- Permissions are split by screen and action: Products, Stock, Inventory audit, POS sessions, Debt ledger, Stock requests, Delivery notes, and a few dozen more groups. Within each group, viewing, creating, approving, and cancelling are separate permissions.
- A Role is a named bundle of permissions. Build roles around the store's real jobs, not job titles on paper.
- Warehouse scope filters data after permissions are settled: someone allowed to view stock but assigned only branch A sees only A's stock.
How warehouse scope works
These rules are the system's actual behavior, worth memorizing before assigning anything:
- A user with no warehouses assigned, and no warehouse-restricted role, sees and works with all warehouses. That is the default for every account.
- Assigning warehouses directly to a user overrides whatever their roles restrict.
- With several roles, the scope is the union; one unrestricted role makes the whole user unrestricted.
- Granting a warehouse grants its entire subtree in the warehouse tree, see Catalog and warehouses.
- The administrator role always sees every warehouse.
In short: to limit someone to their own warehouse, you must assign it deliberately, and make sure no leftover role opens everything back up.
A starter set of roles
Most stores need five roles. Use this table as a starting point and adjust to reality:
| Role | Main permission groups | Warehouse scope |
|---|---|---|
| Cashier | POS sessions, Orders, Customers, Vouchers | The counter's warehouse |
| Warehouse staff | Stock requests, Stock transfers, Stock, RFID tags | Assigned warehouses |
| Warehouse manager | Same as staff, plus approval permissions, Inventory audit, Pick lists and Delivery notes | Warehouses in their charge |
| Accountant | Debt ledger, Reports, Purchase orders, Suppliers | Unrestricted |
| Administrator | Everything, including Users, Roles, and Settings | Unrestricted |
Create a role
Go to Administration → Roles and press New Role.
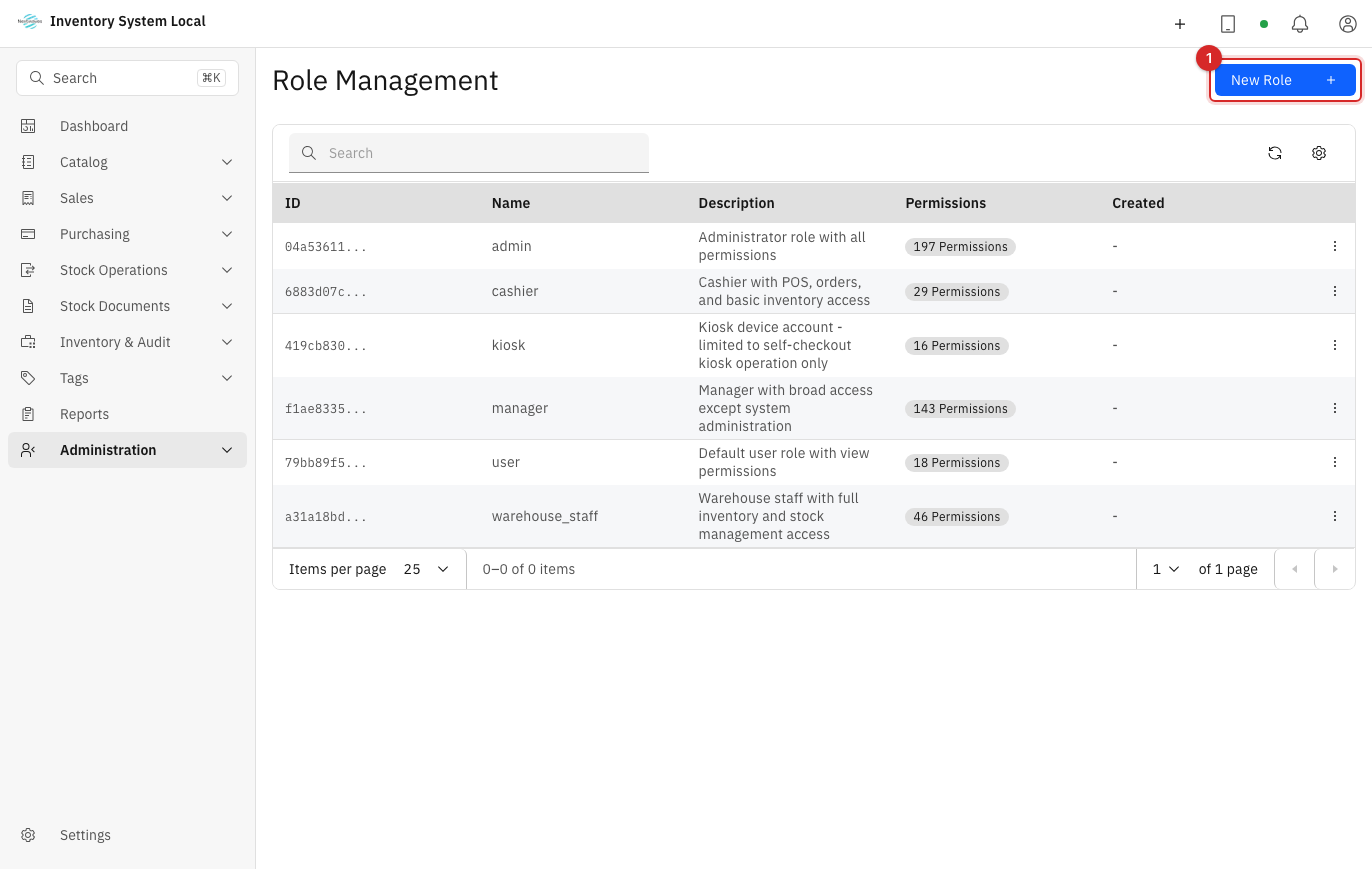
Name it after the job, for example "Morning cashier" if the store runs fixed shifts.
Tick the minimum permissions the job needs, group by group. The permission screen is long, so work from the starter table above instead of reading every row.
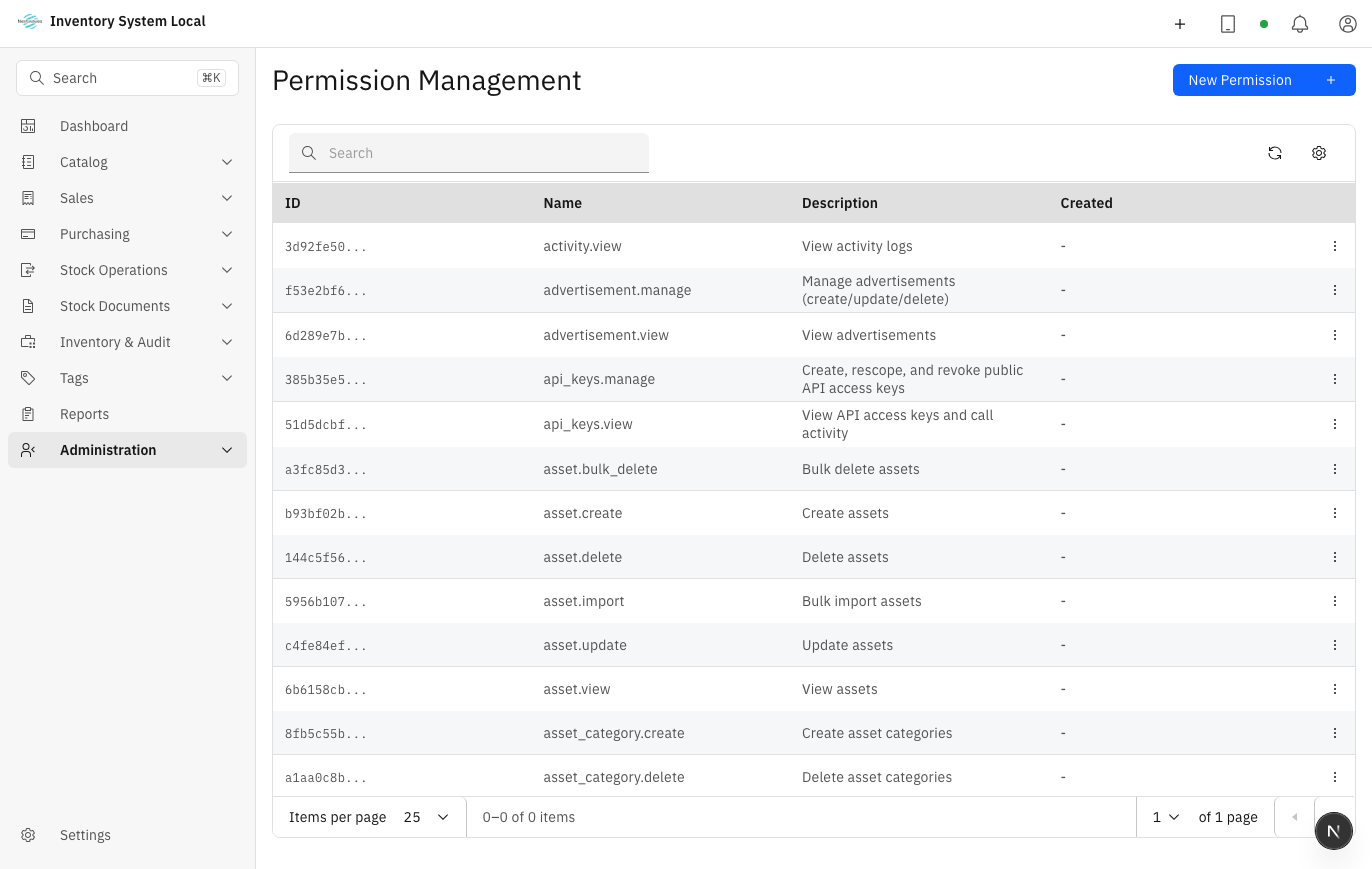
Keep the two-person rule at receiving: creating warehouse documents and approving them are separate permissions, and they belong in different roles. If one person both enters and approves, the stock number rests on a single person's word, see why in Purchase and receive.
Save, then sign in with an account holding this role, not an admin account, and click through the main screens. Whatever is missing, add it now, before anyone works for real.
Create a user
Go to Administration → Users and press New User.
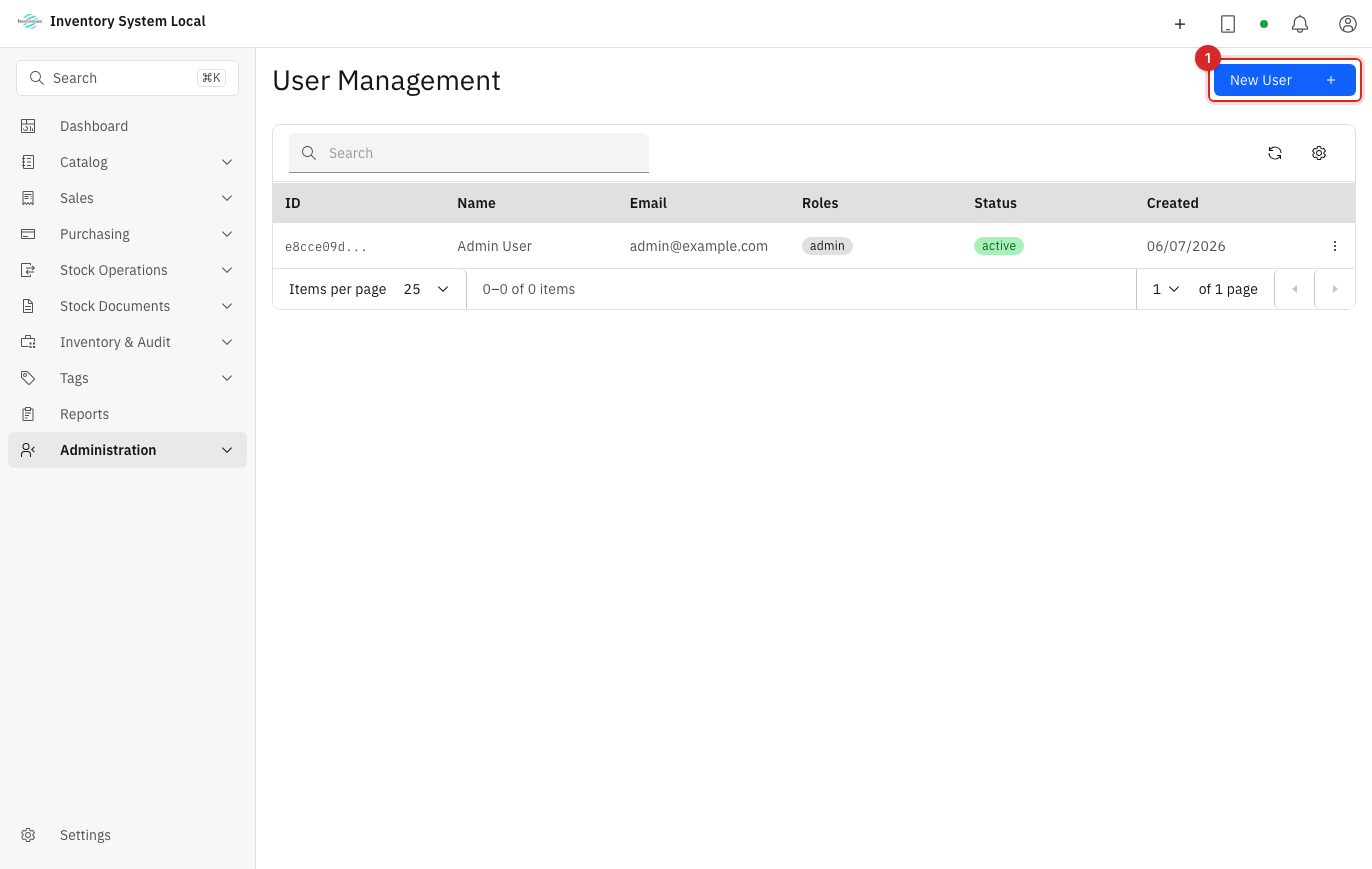
Enter the name, email, and an initial password, then assign at least one role. An account without a role can sign in but sees an empty menu, which is easily mistaken for a bug.
If this person should only work in certain warehouses, assign them on the profile, following the scope rules above. Assigning nothing means seeing everything.
Hand over the initial password and tell them to change it at first sign-in, under their own Account security.
When an employee leaves, deactivate the account instead of deleting it: their history in the activity log still needs a name attached. Delete only when the company's retention policy allows it.
Turn on two-factor authentication
Two-factor authentication (2FA) asks for a phone-generated code at sign-in and stops most leaked-password incidents.
- Each person enables it under Account security, pressing Set up two-factor authentication and scanning the code with an authenticator app.
- To make it mandatory company-wide, open the Security settings group and enable the Two-factor policy.
- Before enforcing, at least one administrator must have registered 2FA and completed a successful sign-in with it. Enforcing before anyone registered locks the whole company out, with the person holding the key standing outside too.
Audit with the Activity Logs
Administration → Activity Logs records who did what and when. Filter by time, actor, or business area, then open the details of a change. The questions it usually answers: who changed this product's price, who approved that receipt, did that account sign in outside working hours.
When something goes wrong
| Symptom | Likely cause | What to do |
|---|---|---|
| Signs in but the menu is empty | No role assigned | Assign a suitable role and sign in again |
| One specific menu entry is missing | Role lacks the permission, module off, or plan lacks the feature | Check in exactly that order, see Settings and integrations |
| Sees less data than a colleague | Restricted by warehouse scope | Review assigned warehouses and the roles held |
| The approve button does nothing for them | Missing the approval permission for that document group | Grant it through a role, keeping creator and approver separate |
| Employee lost their phone, stuck at 2FA | Cannot produce the code | Another administrator resets 2FA on the account in user management, then re-enroll on the new phone |
Read next
- Settings and integrations: the Security group and sign-in policies.
- Catalog and warehouses: the warehouse tree, the unit of access scope.
- Purchase and receive: the two-person rule in day-to-day operation.