

Create the catalog and warehouses
This step lays the foundation for everything that follows: stock-in entries, the POS screen, and reports all pick from the products and warehouses you create here. With no products, a stock-in entry has nothing to add; with no warehouses, goods have nowhere to arrive.
Two decisions must be settled before the first product exists, because they are close to impossible to change once stock is on hand: which Base unit the goods count in (piece, box, or kg), and whether to enable Track batches / lots. If you are unsure about batches, read the explanation in Set up the system first.
Products, variants, and the different codes
Before pressing any button, get the data model straight, because entering data at the wrong level is the hardest mistake to unwind:
- Product Categories are groups for filtering and reporting, one level deep, no subgroups. For example: Shirts, Trousers, Accessories.
- A Product is a model you sell, such as "Crew-neck t-shirt".
- A Variant is what the system actually counts. Every combination that needs its own stock number is one variant: that shirt in black size M is one variant, white size L is another. Anything that does not need separate counting should not become a variant; keep the catalog lean.
- The SKU is a code you invent and must be unique across the system; the barcode usually comes from the manufacturer and can repeat across sellers. Pick a SKU convention from day one: when you connect a marketplace, the two sides match products by SKU, see Process channel orders.
- An EPC only appears with RFID: one code per physical item. A hundred identical shirts share one SKU but carry a hundred different EPCs, which is how the system tells individual pieces apart, see Manage RFID.
Create categories and products
Go to Catalog → Product Categories and create the groups you need first.
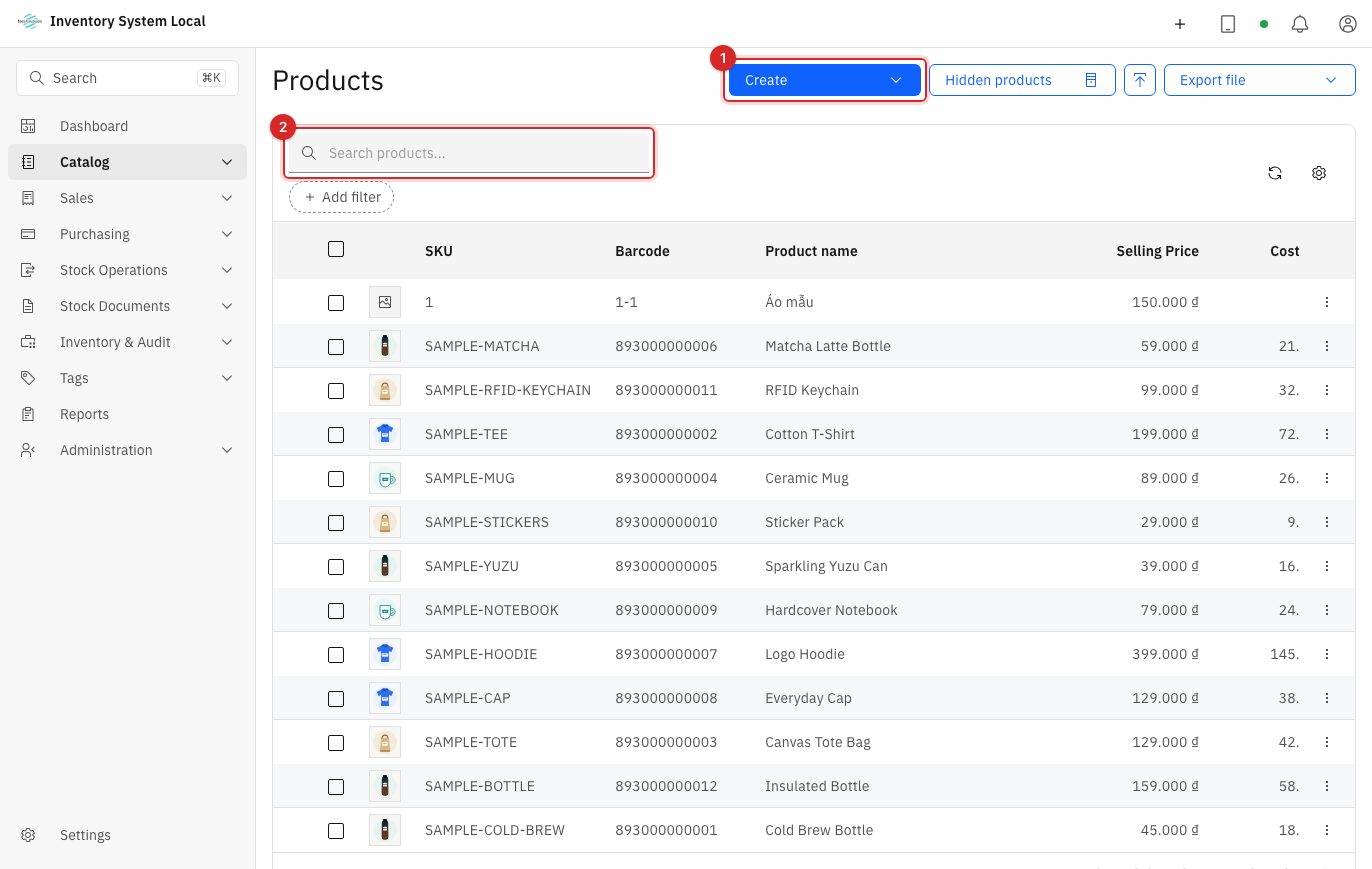
Go to Catalog → Products. The create button sits in the top right corner; the search box below it matches names, SKUs, and barcodes.
Fill in the details: name, SKU, Base unit, category, Cost Price, and selling price.
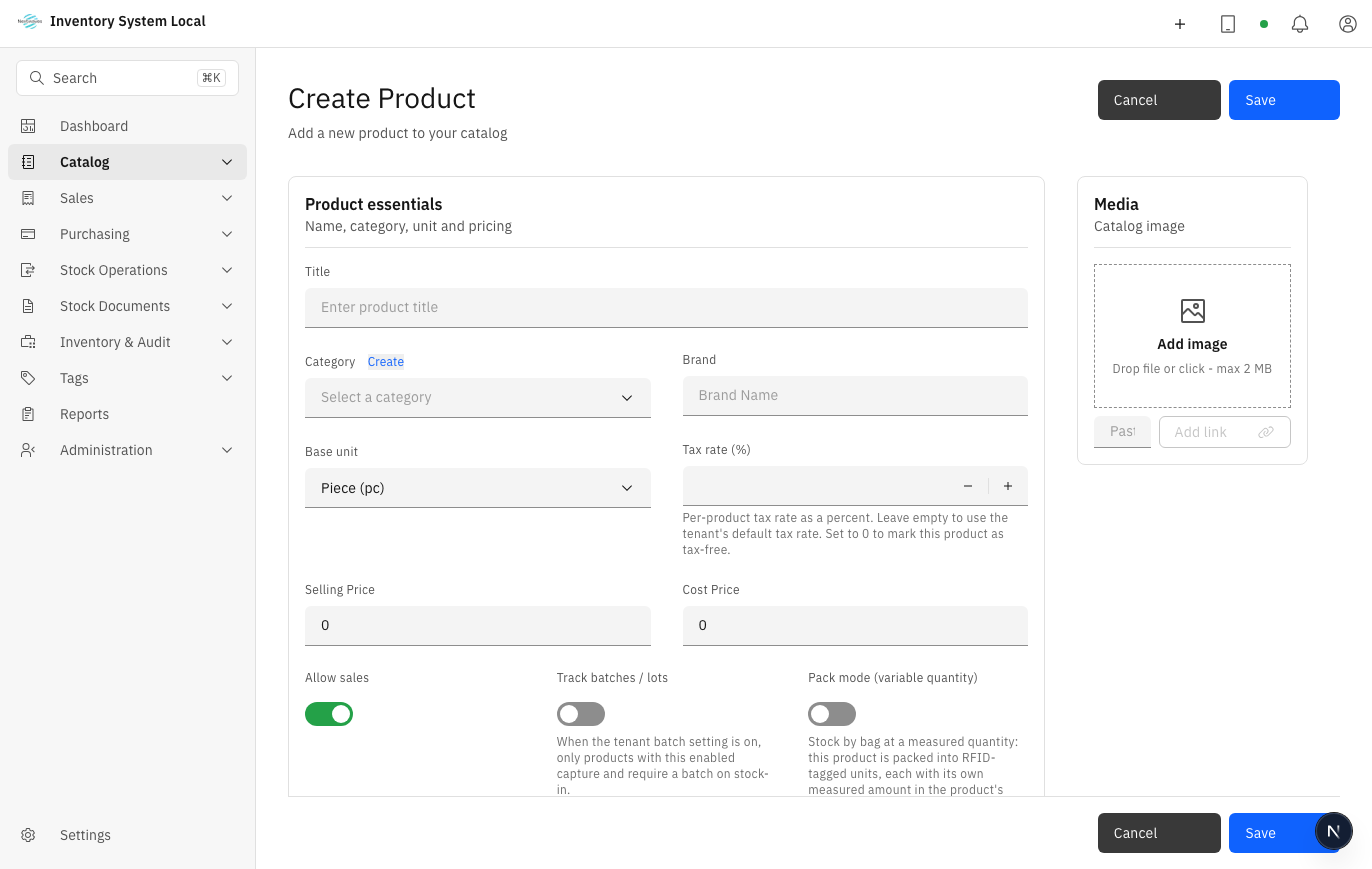
Never leave Cost Price empty. Without it, every profit report shows 0, and this mistake typically surfaces months later when it is miserable to backfill, see Review reports.
Add Variants for each combination that needs its own stock number, usually color and size. Price and barcode can differ per variant.
Switch on what applies: selling, Track batches / lots for goods with expiry dates, and the RFID options if items will carry tags. Save.
Bulk import from a spreadsheet
Past a few hundred codes, stop typing. The products screen has an Import button:
- Download the template from the import dialog.
- Fill your data into a copy of the template. Keep the SKU and barcode columns formatted as text, otherwise the spreadsheet strips leading zeros.
- Import a small batch first. The importer validates every row before writing anything, so a single bad row rejects the whole file; a small trial catches format problems early.
- Fix bad rows in the source file and import again; do not patch records by hand in the system, or the file and the data stop matching.
- Spot-check a few imported products for SKU, variants, price, and selling status before importing the rest.
Create warehouses and the warehouse tree
Go to Catalog → Warehouses and press Create Warehouse.
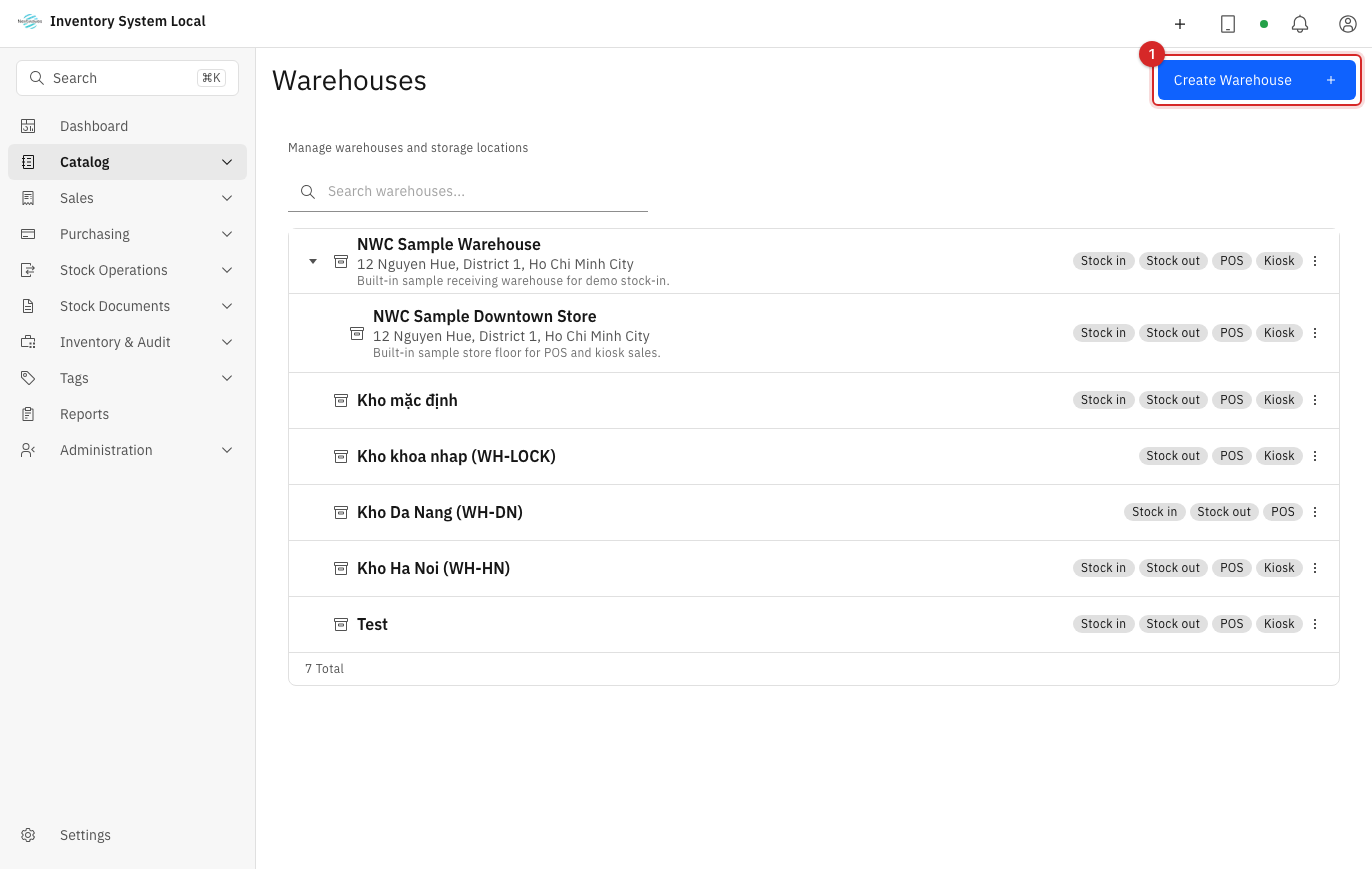
Enter the name, the address, and a Parent Warehouse if this is a child. Warehouses form a tree: a central warehouse with branch stores, or one shop with a front area and a back room. The tree is also the unit of access control: granting someone a warehouse grants its whole subtree, see Users and security.
Pick the warehouse Capabilities: stock in, stock out, POS, and kiosk. This is a safety valve, not decoration: a display counter that only sells gets stock-in switched off, so nobody receives goods into it by accident; a transit warehouse that never sells gets POS switched off. Whatever capability is off, documents of that type simply will not offer this warehouse.
Save.
Build bins inside a warehouse
This section only matters when bin tracking is enabled under Settings → Inventory settings, and bins can only be enabled after batch tracking is on.
Open the warehouse menu and choose View Nodes: the warehouse's location tree opens, where each node is a place that holds goods, from large to small, for example zone A, rack 3, bin 12.
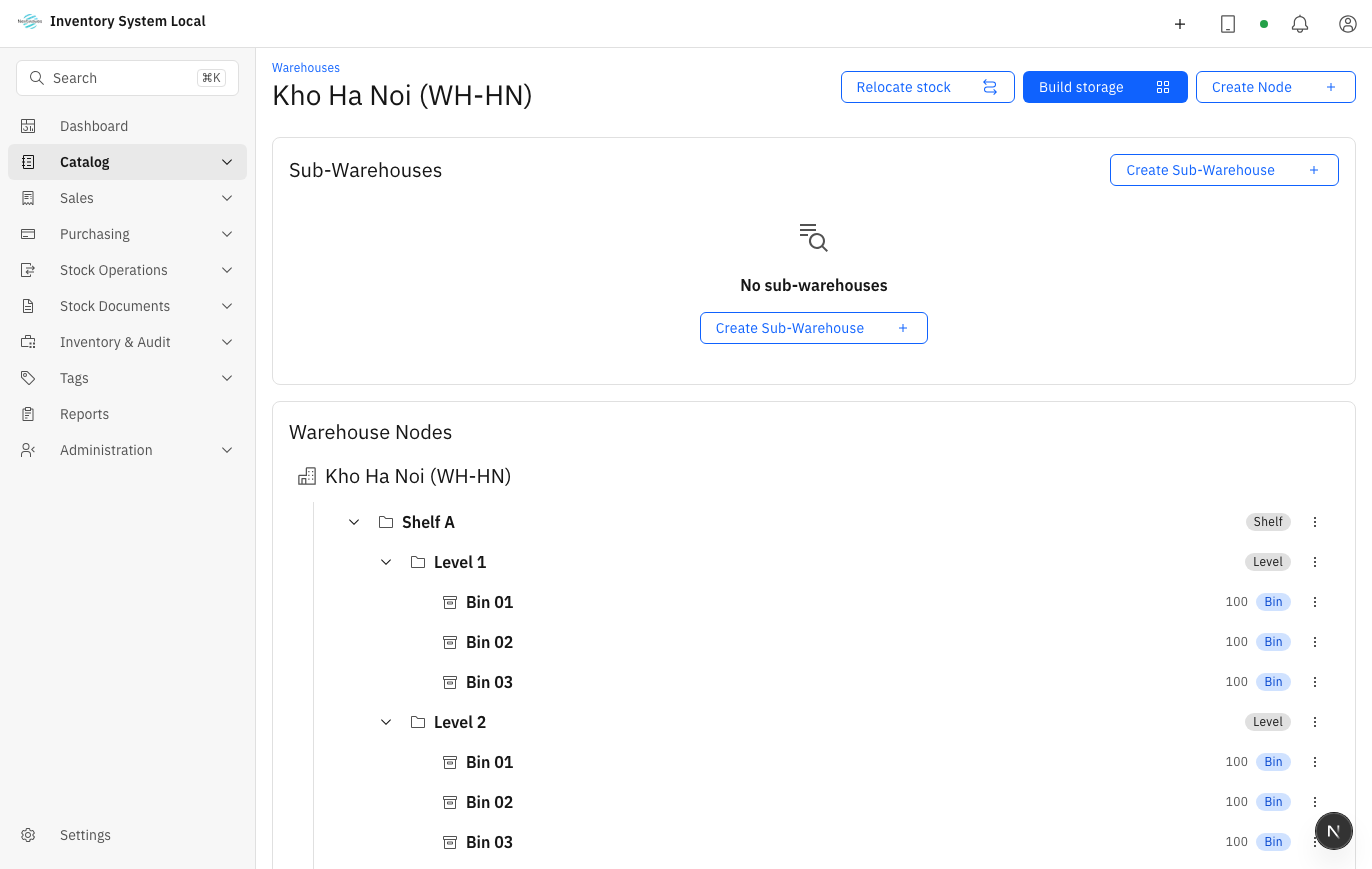
With the tree in place, stock-in entries can put goods into a specific bin, and consolidating stock between bins uses the bin relocation action, see Issue, transfer, and adjust stock.
Check the result
Reopen any product: right variants, right prices, cost price present. Open a draft stock-in entry: the new warehouse must be selectable. Open the POS: warehouses with the POS capability must appear.
If a document will not offer a warehouse, look in two places: whether the warehouse's Capabilities include that operation, and whether your account has been granted that warehouse.
Read next
- Purchase and receive: load opening stock into the warehouses you just created.
- Set up the system: what batch tracking, bins, and stock consumption order mean.
- Manage RFID: attach an EPC to every physical item.