

Purchase and receive goods
This is the gate where goods enter the system, usually with warehouse staff receiving and a warehouse manager approving. Two documents are easy to confuse: a purchase order records the plan agreed with a supplier, while a stock-in entry records goods actually arriving. A purchase order never touches stock; only a completed stock-in entry makes stock rise.
Before you start
If the business runs a formal purchasing process, enable the Suppliers and Purchase orders modules under Settings → Features, see Settings and integrations. Products and the receiving warehouse must exist first, see Catalog and warehouses, and products should carry a Cost Price so profit reports have data.
Create a purchase order
- Go to Purchasing → Purchase Orders and create a new order.
- Pick the supplier and the receiving warehouse.
- Add products, quantities, and purchase prices.
- Check the total, then confirm the order the way your company approves purchases.
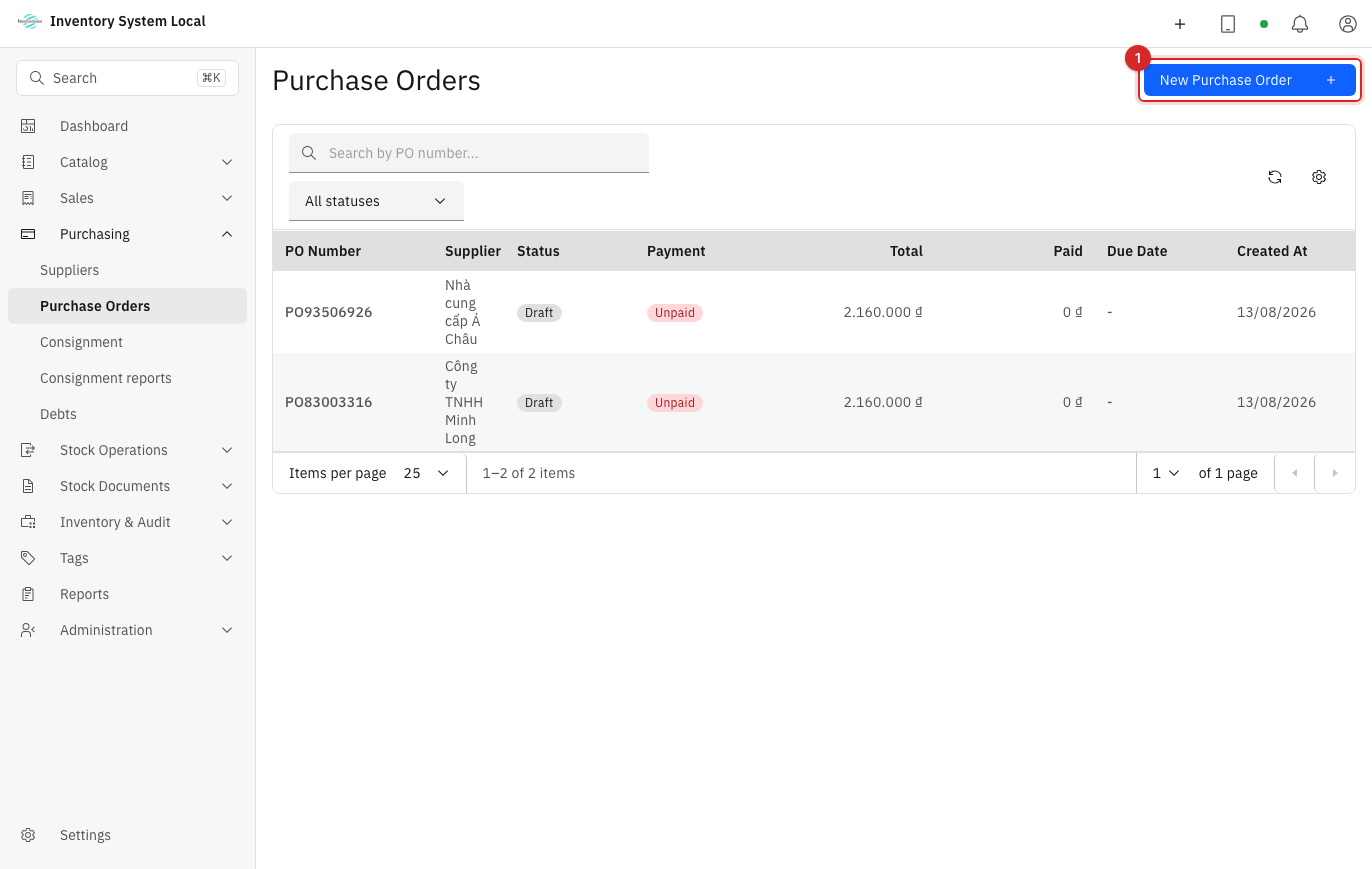
The amount owed to the supplier is tracked in the debt ledger, see Debt and consignment.
Receive without a purchase order
Purchase orders are optional. Goods arriving without a prior order, like opening stock at rollout or a casual purchase, go straight onto a stock-in entry: the steps, approval states, and ledger lines are identical. The only difference sits in the entry's Reason field, where you tell whoever reads the ledger later why that batch of goods appeared.
Receive goods into the warehouse
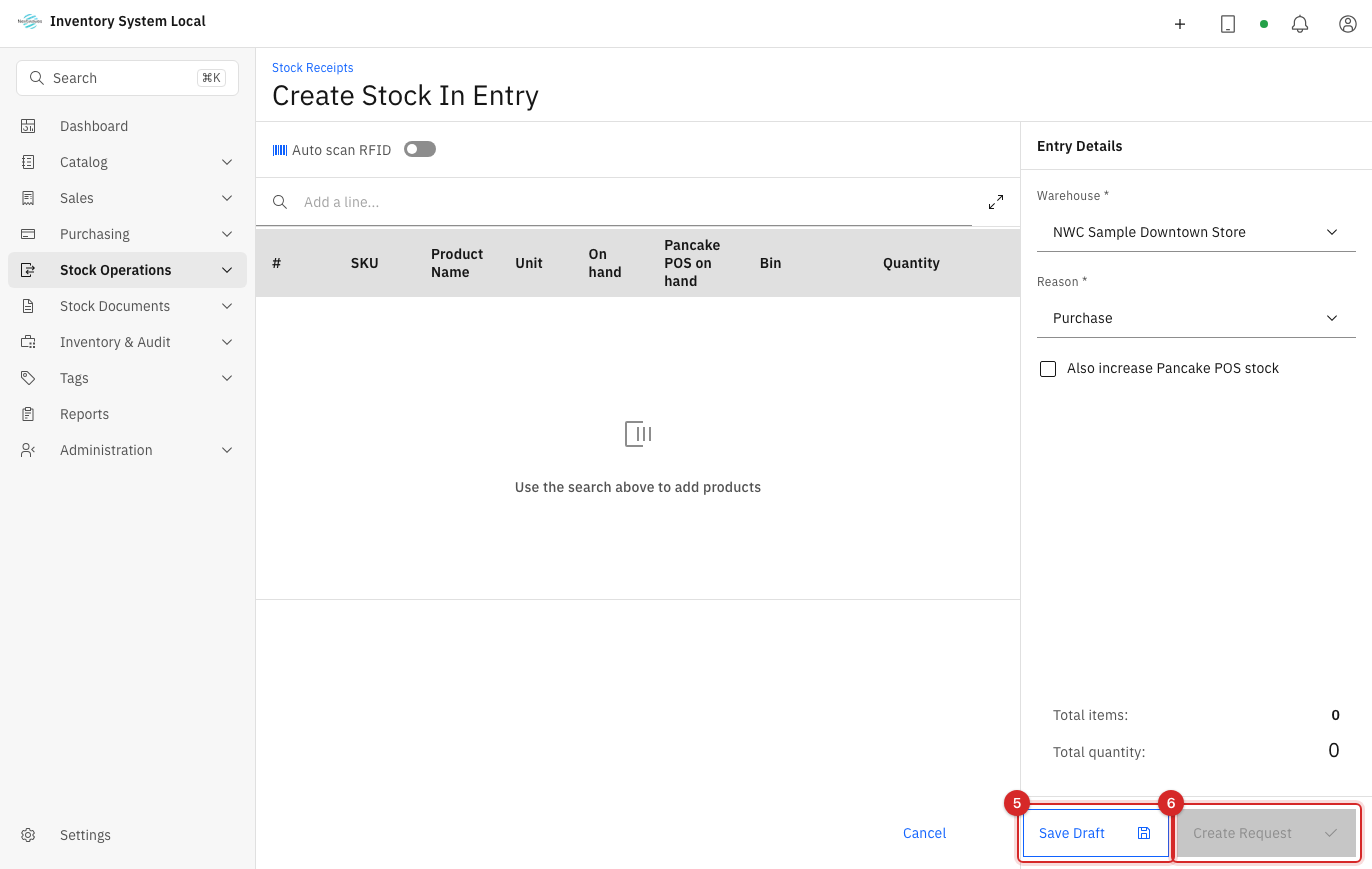
Go to Stock Operations → Stock In.
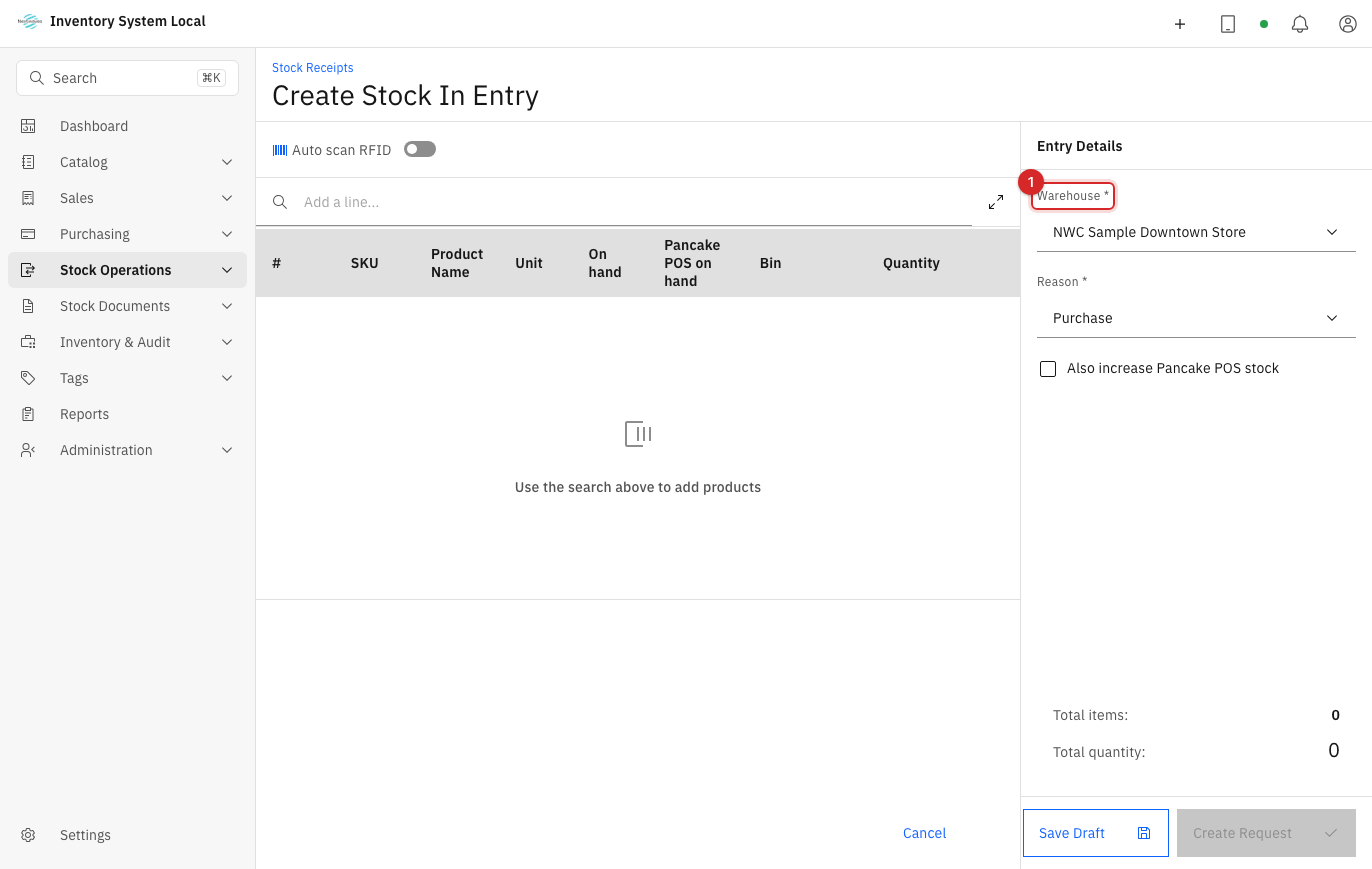
1. Check the receiving warehouse
The system pre-fills the warehouse you used last time, and this is the most commonly wrong field on the entry. Look at it before adding a single line.
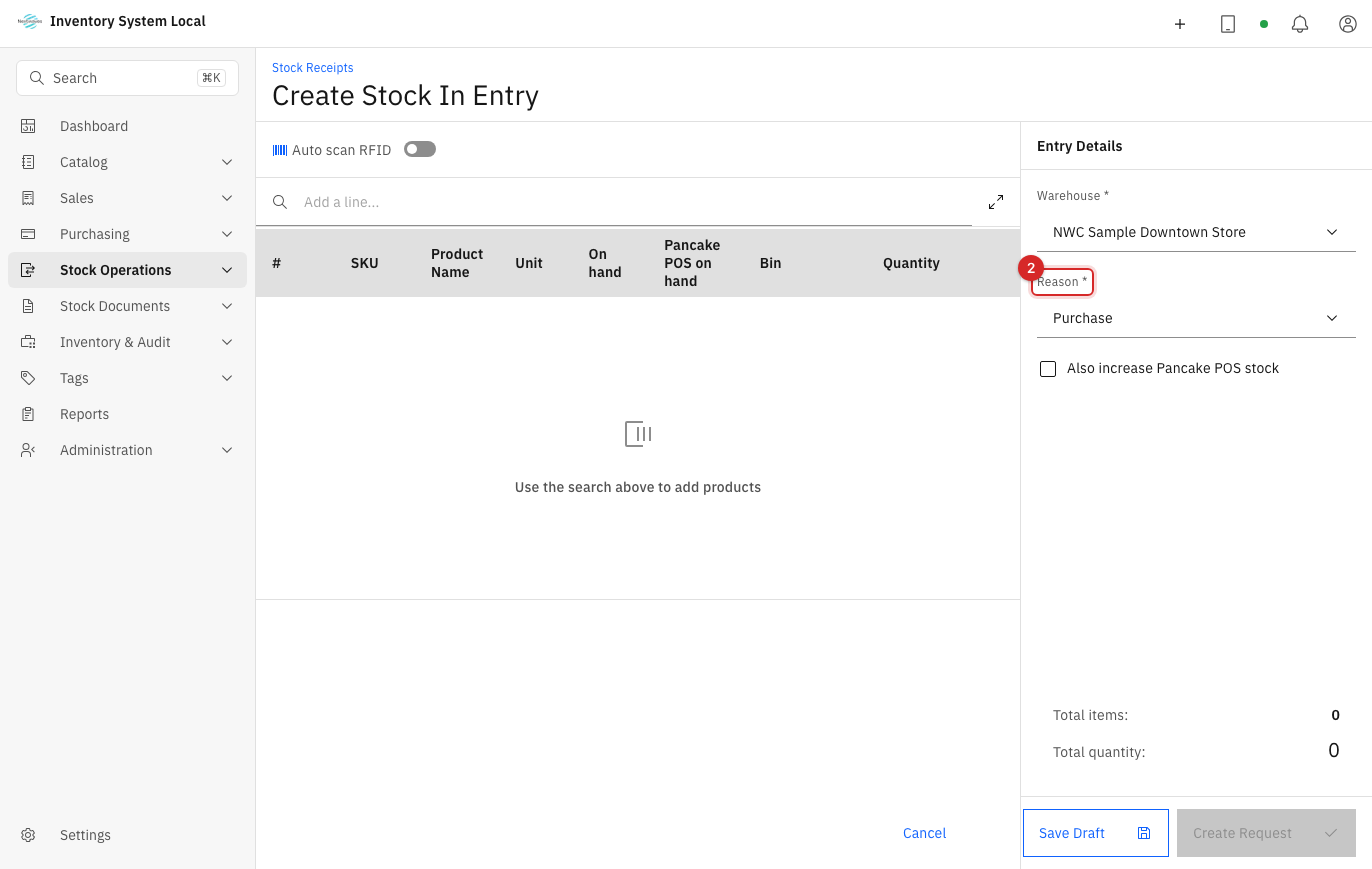
2. Pick the receiving reason
Pick the reason that matches reality rather than the first one on the list: months from now, that reason line is the only thing in the ledger telling the story. Some reasons require an accompanying note.
3. Add products to the entry
Use the Add a line... box to find products by name, SKU, or barcode, then enter quantities.
For RFID-tagged goods, select the exact product or variant first, turn on Auto scan RFID, and scan the whole batch: every EPC read becomes one unit of stock, see Manage RFID.
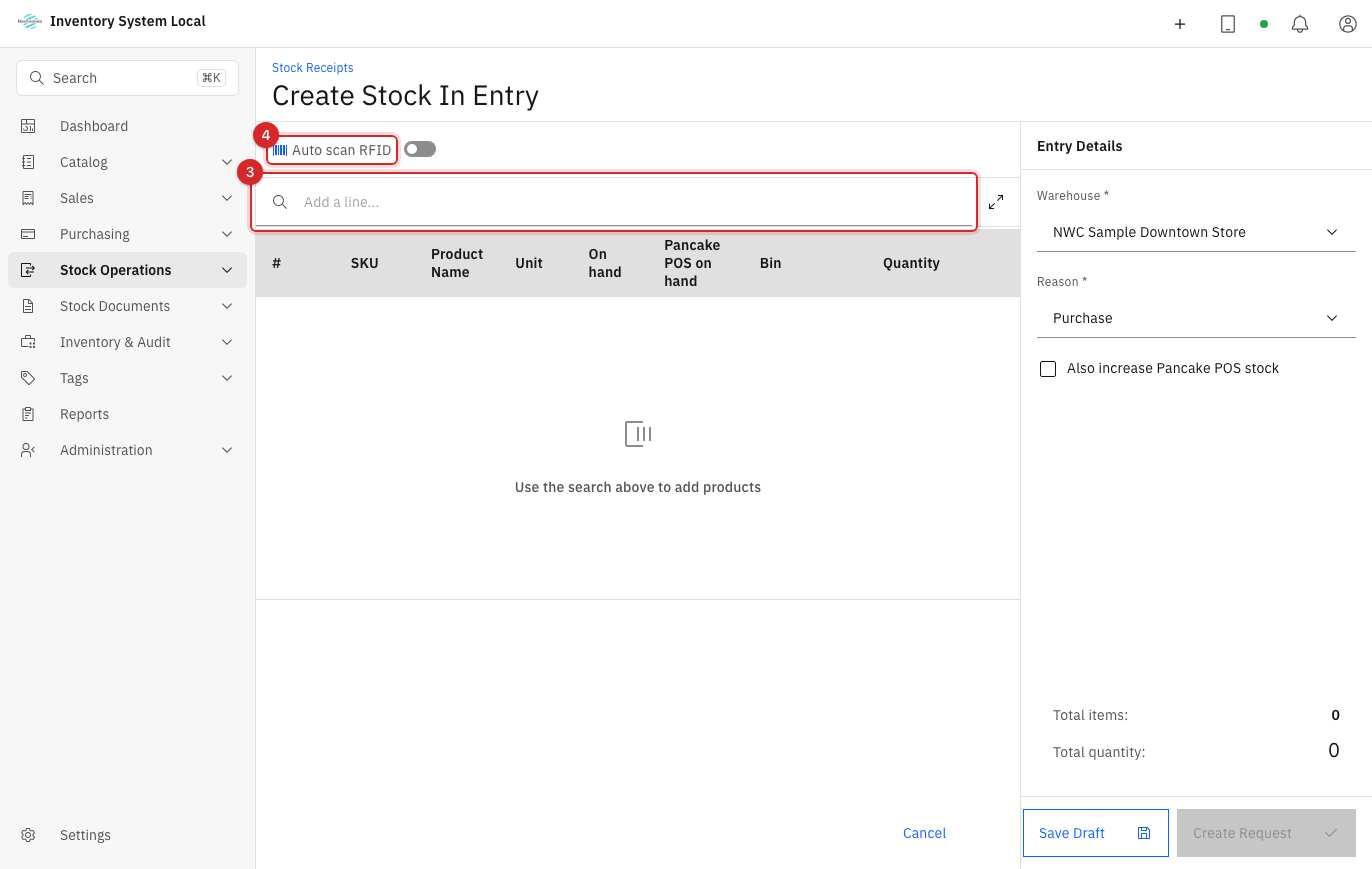
Only leave auto scan on while the read zone contains just the batch being received, because readers pick up the neighboring pallet's tags too. Finish one batch, switch auto scan off, then move to the next product.
Batch-tracked products need a batch number and expiry date; without them the line will not save.
4. Compare before submitting
Compare the on-screen quantities with the goods actually received. For RFID goods, compare the EPC count with a hand count; a mismatch means unread tags or a stray tag in the zone.
5. Save a draft or submit
Press Save Draft if you are not done, or Create Request to send the entry on its way.
Complete the entry
Stock-in entries follow the shared lifecycle of every warehouse document: Draft → Submitted → Approved → Completed, and stock only rises at the final step, see the full diagram on the overview page.
If mandatory approval is on, the entry waits under Stock Documents → Stock Receipts. Someone with the approval permission opens it, compares each line against the goods actually received, then approves and completes it.
The creator of an entry cannot complete their own document unless they also hold the approval permission. That is deliberate: the person receiving goods and the person confirming the numbers are two people, so no figure rests on a single person's word, see how to grant this in Users and security.
If fewer goods arrive than the purchase order says, receive the true quantity; never enter the ordered amount "to close the order neatly". The purchase order keeps the ordered numbers for your conversation with the supplier, while the ledger must record the goods that exist.
Check after receiving
- Open Inventory & Audit → Stock Levels and filter by the receiving warehouse.
- Open the Stock Ledger and find the increase line with the entry number attached.
- For RFID goods, look up a few EPCs under Tags → Tag Inspect to confirm the right product and warehouse.
When something goes wrong
| Symptom | What to do |
|---|---|
| Stock unchanged after creating the entry | Still Submitted. Complete it under Stock Documents → Stock Receipts |
| A warehouse cannot be selected | Its stock-in capability is off. Fix the warehouse configuration, see Catalog and warehouses |
| Reason reported missing | The reason is required, or that reason needs a note |
| RFID required error | Configuration demands scanned tags. Scan with a reader instead of typing quantities |
| Batch number missing | The product tracks batches. Enter the batch and expiry |
| Duplicate EPC reported | The tag was scanned twice, or belongs to other goods. Look it up under Tags → Tag Inspect |
| The approve button does nothing | The account lacks the approval permission, see Users and security |
| Received into the wrong warehouse | Cancel if not completed; if completed, transfer the goods to the right warehouse |
If a quantity or warehouse is wrong after completion, never edit stock directly: create an adjustment document with a reason and keep the trail back to the original entry, see Issue, transfer, and adjust.
Read next
- Issue, transfer, and adjust stock: the outbound direction, and the right way to fix mistakes.
- Debt and consignment: the payables created by receiving goods.
- Count and reconcile inventory: periodically confirm that what came in is still on the shelf.